This is our step-by-step guide on how to dehydrate biscuits, bread, and muffins. Dehydrating these foods in your food dehydrator is easy to do.
We’ll dehydrate leftover bread to make breadcrumbs for our dehydrated ground beef and dehydrated ground pork. Dehydrated ground beef and ground pork will hydrate much better if you add a starch like these breadcrumbs. During the holiday season, my significant other will use dehydrated bread to make stuffing.
For today’s dehydrator project, we’re going to focus on drying biscuits and English muffins, mostly for our dehydrated biscuits and gravy recipe. I do relish a fresh-made-from-scratch biscuit, but I really don’t have time to make many of them. My fallback solution is store-bought English muffins. I have never cared for the biscuits-in-a-tube and avoided them.
Naysayers, please refrain from commenting on using English muffins vice using flaky-tender biscuits for our biscuits and gravy recipe. English muffins also have significantly less fat which is far better for storage.
While bread, biscuits, and English muffins are all different. We are going to refer to them all as biscuits.
So let’s get started dehydrating biscuits.
Table of Contents
- How to Dehydrate Biscuits
- Supplies and Accessories Needed to Dehydrate Biscuits
- Step 1. The Process for Dehydrating Biscuits
- Step 2. Preparing the Dehydrator for Dehydrating Biscuits
- Step 3. Dehydrating Biscuits
- Step 4. When are the Dehydrated Biscuits Done
- Step 5. Equalizing and Conditioning the Dehydrated Biscuits
- Step 6. Storing the Dehydrated Biscuits
- Hydration
- Weights, Measures, and Serving Sizes
- Dehydrated Biscuits Nutrition Information
- Insider Tips
How to Dehydrate Biscuits
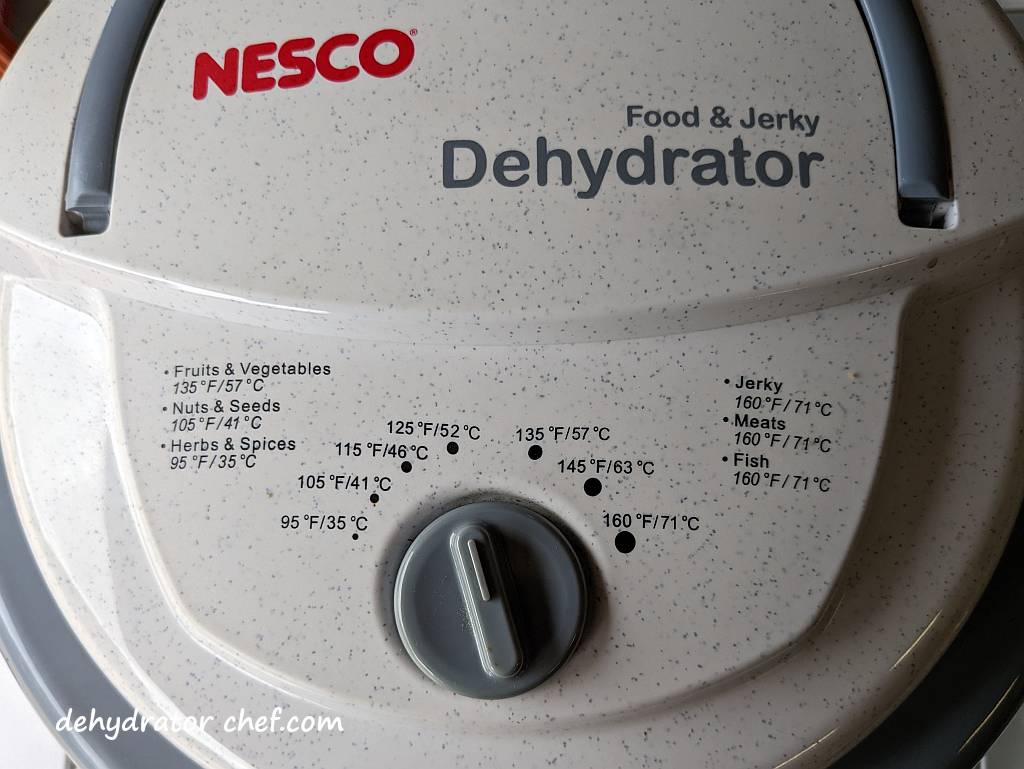
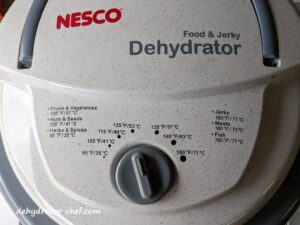
All you need to dehydrate bread, biscuits, and English muffins is a good quality food dehydrator. We use the Nesco food dehydrators. You can check out our food dehydrator guide to learn why we think Nesco offers the best bang for the buck. We believe this is the best food dehydrator for our long-term food storage needs.
Supplies and Accessories Needed to Dehydrate Biscuits
- Biscuits, bread, or English muffins
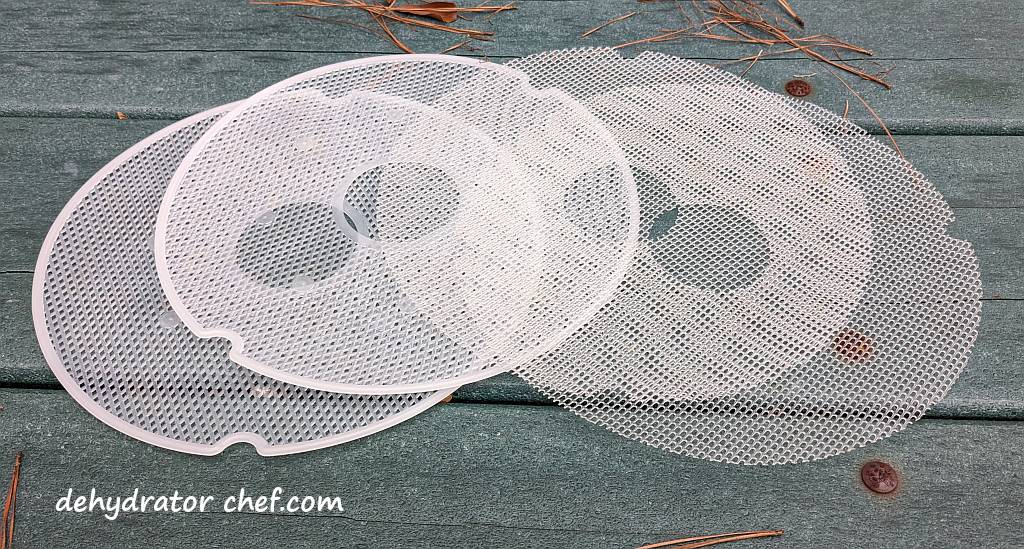
- Food dehydrator with removable mesh screen inserts, one for each tray
- Standard kitchen tools, including cutting boards, chef’s knife, spatula, bench scraper, etc.
- Clear canning jars with tight-fitting lids
- Wide-mouth canning jar funnel
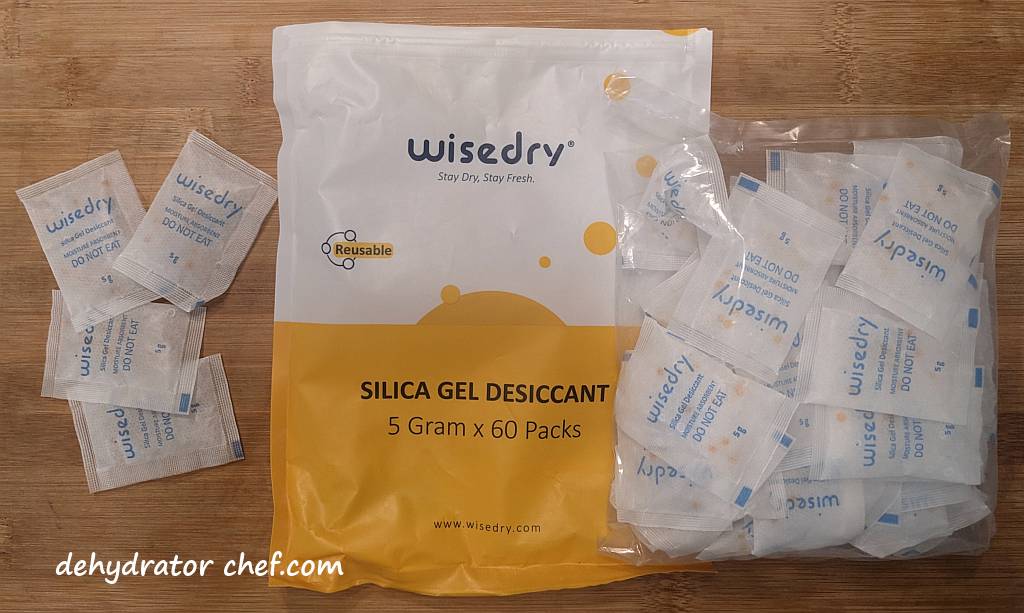
- Desiccant packets (optional)
Step 1. The Process for Dehydrating Biscuits
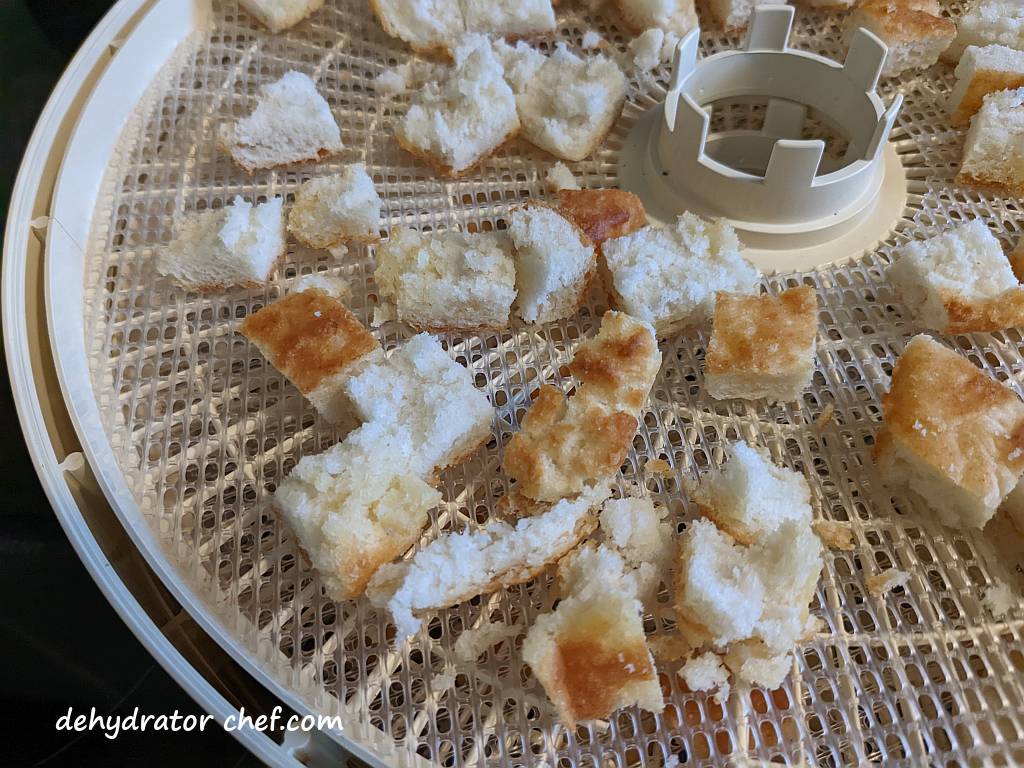
For best results, first split the biscuits in half.

Next, cut each biscuit half into 1/2 to 3/4 inch wide strips. Then, cut each biscuit strip into 1/2 to 3/4 inch biscuit squares.
Step 2. Preparing the Dehydrator for Dehydrating Biscuits
For our dehydrating biscuit project, we are using the Nesco Clean-A-Screen removable mesh screens for sticky fruits and small food items that we are dehydrating today. They have over 2500 customer reviews with an average rating of 4.7 stars out of 5, which is evidence of a great product. Check out other Nesco food dehydrator products here.
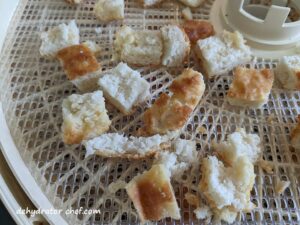
Simply layer the cut biscuit squares over the top of the removable mesh screen inserts.

Nesco Clean-A-Screens are removable and flexible mesh screen inserts that have both a distinct top and a bottom side. If you had a high-powered microscope, you would see the individual strands in mesh screens have a triangle shape. The bottom side of the screen feels smooth. The top point of the triangle feels rough as you rub your fingers across the mesh.
Step 3. Dehydrating Biscuits
Start dehydrating the prepared biscuits at a drying temperature of 125 °F / 52 °C until dry, approximately 4 to 6 hours, depending upon the ambient temperature and humidity and how crowded you fill your dehydrator trays. Remember to use drying times as a guide.
Step 4. When are the Dehydrated Biscuits Done
Fully dried, the biscuit pieces will easily crumble if squeezed between your fingers. So start checking for doneness after 4 hours of dehydration time. Biscuits usually take 4 to 6 hours to fully dehydrate at 125 °F / 52 °C, depending on ambient temperatures and humidity.

Drying times will vary depending on your dehydrator. Refer to your dehydrator owner’s manual for recommended temperatures and times for dehydrating specific foods. Remember to use drying times as a guide.
Step 5. Equalizing and Conditioning the Dehydrated Biscuits
We always recommend letting food items cool completely after they have finished dehydrating and before packing them into an airtight storage container for equalizing and conditioning. Warm food may cause sweating, which could provide enough moisture for mold to grow.

It does not take long for dehydrated food items to start hydrating from ambient household humidity. Do not leave dehydrated food items exposed to the elements any longer than necessary because of the increased risk of mold growth.
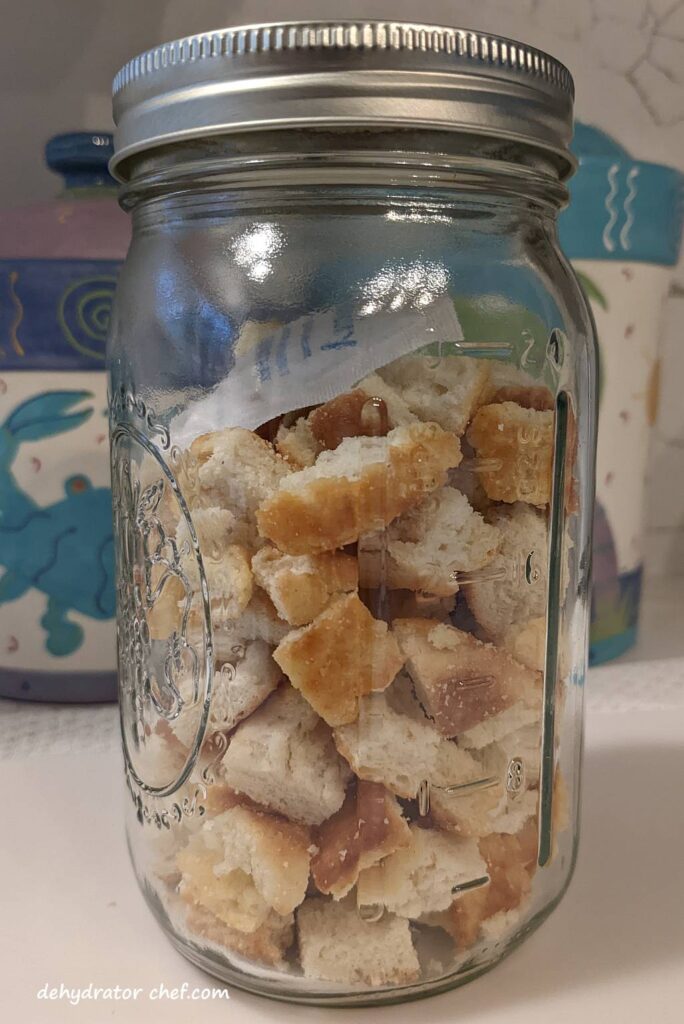
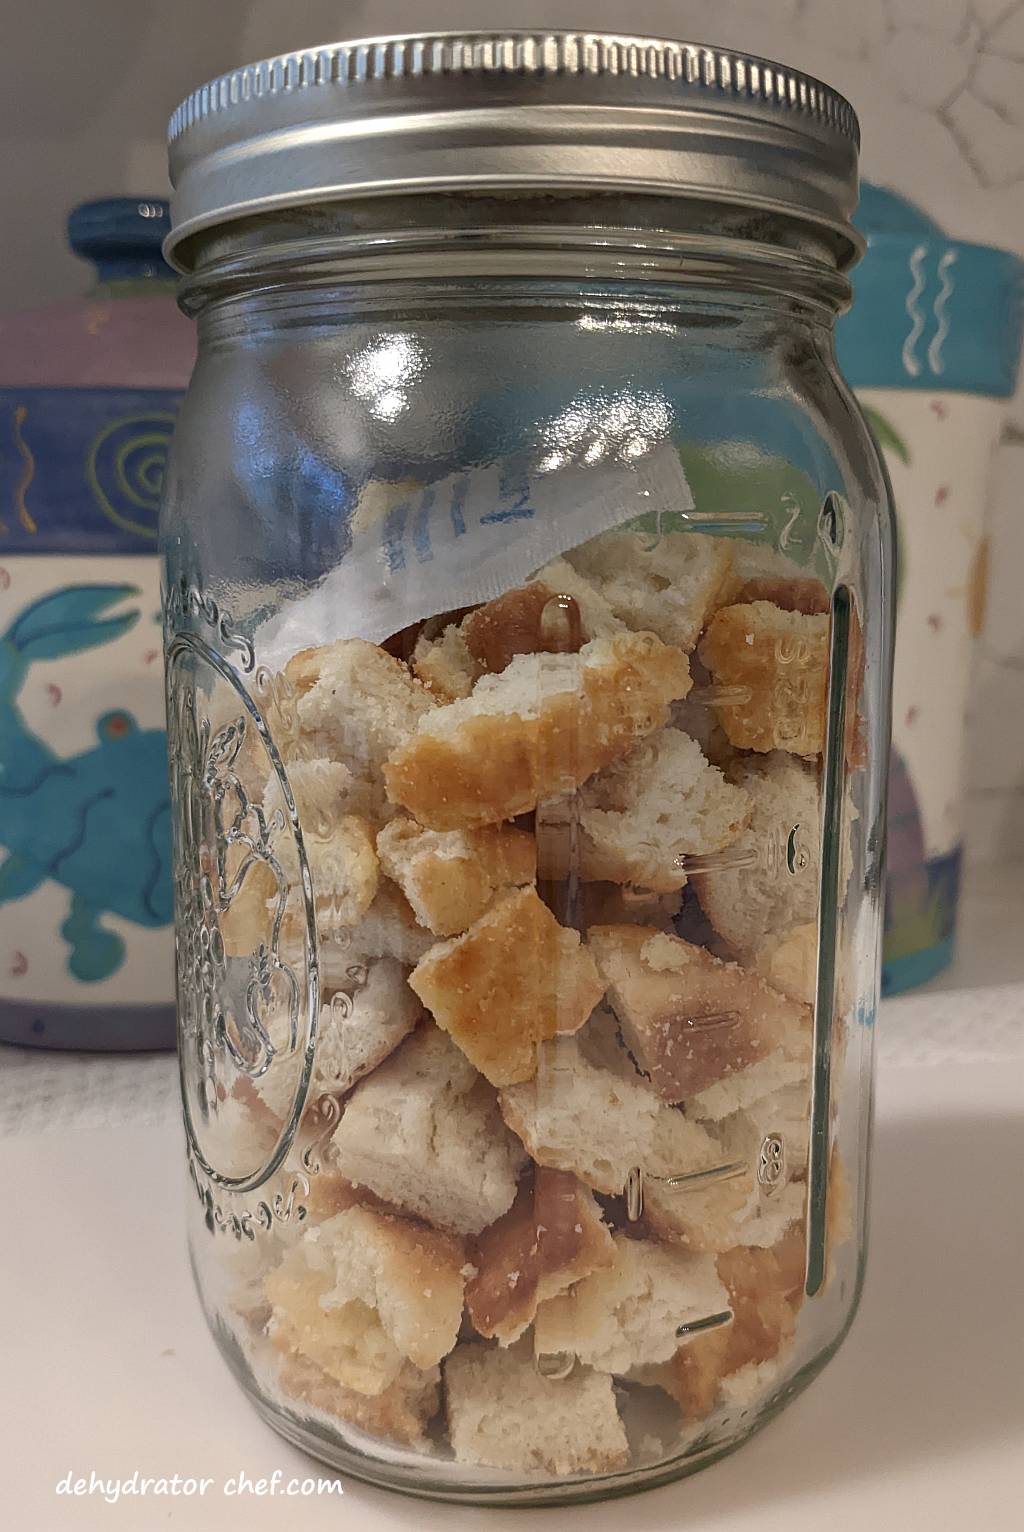
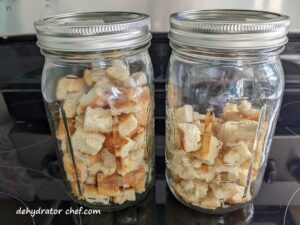
After a short cooling period, pack the dehydrated biscuits into a clean, dry, insect-proof, and air-tight storage container. We use quart-size canning jars for conditioning items like these biscuit pieces. Since the canning jars are clear, it’s easy to see what’s inside.
When the dehydrated biscuit pieces are removed from the dehydrator, the remaining moisture may not be distributed equally among the pieces because of their location and position in the dehydrator. Equalizing and conditioning is a process for freshly dehydrated foods that ensures any residual moisture remaining in any piece is spread or equalized among all the other pieces in the batch. Let the dehydrated biscuits equalize and condition in the storage container for 7 to 10 days.
Every day, check the jar for moisture. Roll the jar contents around and note any clumping or sticking. If seen, put the contents back on the dehydrator for several more hours. Since canning jars are clear, it’s easy to see what’s inside.
If you notice any mold at all, even the smallest bit, throw it all out. What you see are the mold spores finally blooming enough to make them visible. But there are more, even tinier mold spores in the rest of your jar that make your dehydrated food inedible. Toss it out and start another batch.
Step 6. Storing the Dehydrated Biscuits
Use an appropriately sized canning jar for storage. These homemade and then dehydrated biscuits will only keep for a few weeks because they are made with quite a bit of butter. Other types of dehydrated bread, such as English muffins should keep up to 12 months. Exactly how long depends upon your pantry storage conditions.
We’ll use a food-safe desiccant packet for moisture control because we live in a fairly humid area. For our pint-size or quart-size mason jars, we’ll use a single food-safe 5-gram desiccant packet.
We use these inexpensive food-safe desiccant packets, which are available from Amazon. These 5-gram packets have over 5000 of mostly 4- and 5-star customer reviews, with an average of 4.7 stars out of 5. Our bag of 60 desiccant packets will last quite a while because they can be recharged and reused multiple times. Other food-safe sizes are available.
Lastly, I’ll attach or include a short note describing the jar contents and the date the product was dehydrated. Dried biscuits or dried muffins look very similar. The note also lets me know where to go in my dehydrator logbook if I want to make another note or two.
Hydration
Hydrate the dried biscuits using a 1-to-1 ratio of dehydrated biscuits to boiled water. Plan on at least 15 to 20 minutes to fully hydrate.
If you’re supplementing store-bought freeze-dried meals as we do, just add a bit more boiling water to the food pouch. Use the same 1-to-1 ratio of dehydrated biscuits to water and account for the extra time.
Weights, Measures, and Serving Sizes
This information is from a recent entry from the notes we keep on most of our food dehydration efforts.
On average, the biscuits lost about 65 percent of their starting weight in grams. One biscuit is a serving. As dried, a serving of biscuit pieces is roughly 1 cup by volume, 50 grams by weight, or a bit less than 2 ounces.
Dehydrated Biscuits Nutrition Information
Summarizing notes from our dehydrator logbook, one biscuit will dehydrate to approximately 50 grams, about 1 cup by volume.
Nutrition information is only an estimate and may differ depending on the ingredients you use.
Serving Size: 50 grams | Calories: 340kcal | Total Fat: 16g | Saturated Fat: 9g | Cholesterol: 0mg | Sodium: 840mg | Carbohydrate: 41g | Dietary Fiber: 2g | Sugar: 4g | Protein: 6g
 | The Dehydrator Chef Book Available only on Amazon.com You’ll find step-by-step instructions for 26 homemade dehydrated camping meals. Many recipes are only available in this book. Grab yourself a copy today. |
Insider Tips
Besides dehydrated meal recipes found here, add dehydrated biscuits to any of your favorite freeze-dried food pouches. One of my favorites is the Mountain House Biscuits and Gravy, along with some of our dehydrated pork crumbles. Just be sure to compensate by adding additional boiled water in a 1-to-1 ratio and allow enough time for adequate hydration.
Practice at home making dehydrated camping meals using the very same gear used in the field. We practice reinforcing the skills we have learned. Practice makes perfect.
How to Dehydrate Biscuits, Bread, and Muffins
Equipment
- Removable mesh screen insert (one for each dehydrator tray)
- Common kitchen tools (including cutting boards, chef's knife, spatula, bench scraper, etc.)
- Canning jars with tight-fitting lids
- Desiccant packets for moisture control (optional)
Ingredients
- several biscuits, bread, or English muffins
Instructions
Process the Biscuits
- Split the biscuits in half.several biscuits, bread, or English muffins

- Break down each biscuit half into strips, approximately 1/2 to 3/4 inch (12 – 24 mm) strips. Then, cut each strip into bite-sized pieces.

Prepare the Dehydrator
- Spread and layer the processed biscuit pieces onto the mesh screen inserts; two to three biscuits will fill one 13.5-inch round dehydrator tray. If it’s too crowded, prepare another tray.

Dehydrate the Biscuits
- Set the dehydrator thermostat temperature to 125 °F (52 °C). Dry for 4 to 6 hours until done.
When are the Dehydrated Biscuits Done
- When finished, they are crisp little squares that easily crush into a powder.
Equalizing and Conditioning the Dehydrated Biscuits
- After a short cooling period, loosely pack the dried biscuit pieces into a clean, dry canning jar with a tight-fitting lid, leaving some headspace.
- Every day, for 7 to 10 days, check the jar for moisture. Roll the jar contents around and note any clumping or sticking. If seen, put it all back on the dehydrator for several more hours.
- If you notice any mold at all, even the slightest bit, throw it all out.
Storing the Dehydrated Biscuits
- Use appropriate-sized canning jars for storage. Depending on how well you dehydrate them and your pantry storage conditions, the dehydrated biscuit pieces should keep for at least 12 months.
- An optional food-safe desiccant packet will aid with moisture control and enable a longer shelf life

- Attach or include a label describing the jar contents and the date the product was dehydrated. The label identifies the canning jar contents, and the date helps with the rotation schedule. A first-in, first-out rotation helps us to use items that have been on the shelf the longest, so we're using the oldest food first.
Notes
Nutrition
Nutrition information is only an estimate and may differ depending on the ingredients you use.