Why dehydrate canned beans? Well, several reasons. They’re great for camping, hiking, and backpacking meals because they hydrate quickly. So you won’t need to spend a lot of time or fuel to cook meals that use them. They are also great for making homemade MREs for the same reason.
We can also use dehydrated canned beans to doctor up those store-bought freeze-dried food pouches.
Canned beans, whether they be black beans, pinto beans, kidney beans, white beans, lentils, or others, can all be dehydrated. Whereas, dehydrated home-cooked and dried beans remain hard when you rehydrate them.
Dehydrated canned beans are also shelf-stable and properly stored; they will last many months.
Beans and legumes are excellent sources of dietary fiber, protein, B vitamins, and many other important vitamins and minerals. There is evidence that suggests they can even help reduce blood sugar, boost heart health, and maintain a healthy gut microbiome.
So, let’s get started dehydrating some canned beans.
Table of Contents
- How to Dehydrate Canned Beans
- Supplies Needed for Dehydrating Beans
- Step 1. Process for Dehydrating Canned Beans
- Step 2. Prepare the Dehydrator to Dehydrate Canned Beans
- Step 3. Dehydrating Canned Beans
- Step 4. When are the Dehydrated Canned Beans Done
- Step 5. Equalizing and Conditioning the Dehydrated Beans
- Step 6. Storing the Dehydrated Beans
- Hydration
- Weights, Measures, and Serving Sizes
- Dehydrated Black Beans Nutrition
- Insider Tips
- How to Use Dehydrated Beans in Camping Meals
How to Dehydrate Canned Beans
It’s easy to dehydrate canned beans. So, pick up several cans and give it a go. You’ll be surprised how easy this is to do.
All you need to dehydrate canned beans is a good-quality food dehydrator. We use the Nesco food dehydrators. You can check out our food dehydrator guide to learn why we think Nesco offers the best bang for the buck. We believe this is the best food dehydrator for our long-term food storage needs.
Supplies Needed for Dehydrating Beans
- Several 15-ounce cans of your favorite canned beans
- Food dehydrator
- Removable fruit roll sheet inserts, one for each dehydrator tray
- Standard kitchen tools, including cutting boards, chef’s knife, spatula, etc.
- Clear canning jars with tight-fitting lids
- Wide-mouth canning jar funnel
- Food-safe desiccant packets (optional)
Make the most of your food dehydrator by filling it up with similar items requiring the same drying temperatures during each session. This will help you stock up your pantry. Spending a little extra time now to maximize the food dehydrator’s capabilities will save you time in the long run.
 | Make Your Own Dehydrated Camping Meals Available only on Amazon.com Step-by-step instructions for 26 homemade trail meals, from hearty dinners to quick breakfasts. Includes exclusive recipes not published on the blog. Grab yourself a copy today. |
Step 1. Process for Dehydrating Canned Beans

Open your can of beans and dump the contents into a colander. We’ll need to rinse away all the thick and starchy liquid and salt from the beans so we can dehydrate them.
Step 2. Prepare the Dehydrator to Dehydrate Canned Beans
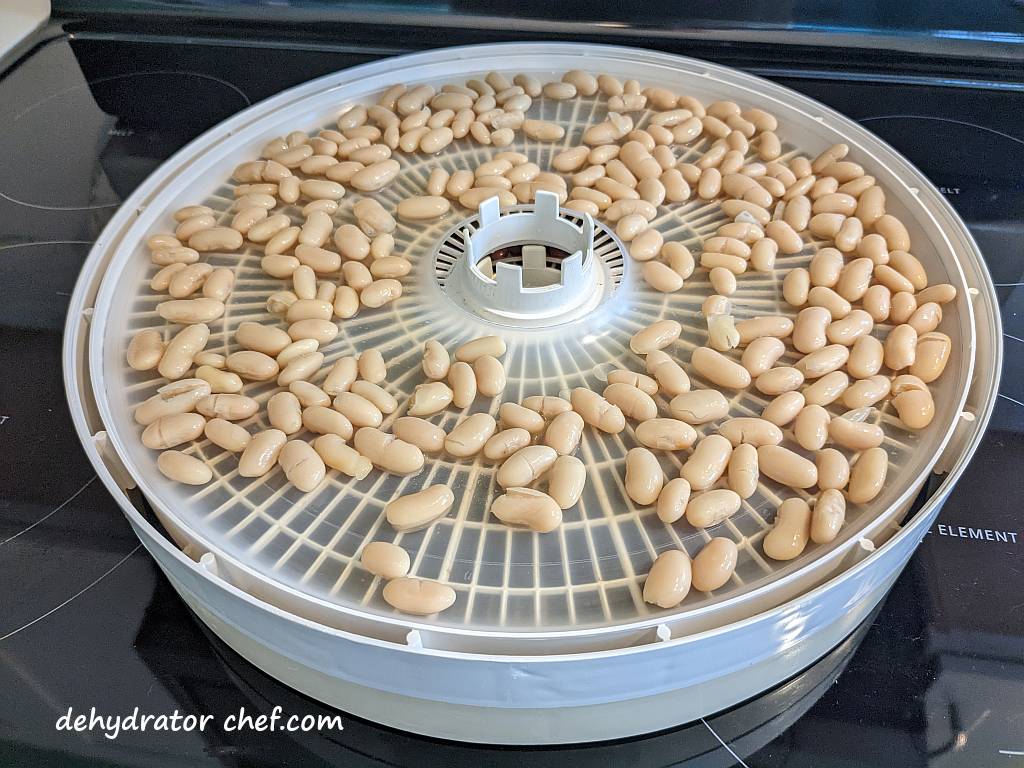
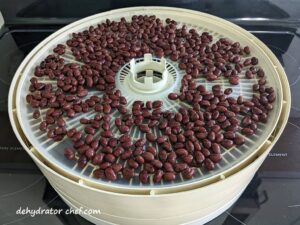
We are using removable fruit roll sheet inserts on our Nesco FD-61 food dehydrator trays for dehydrating canned beans.
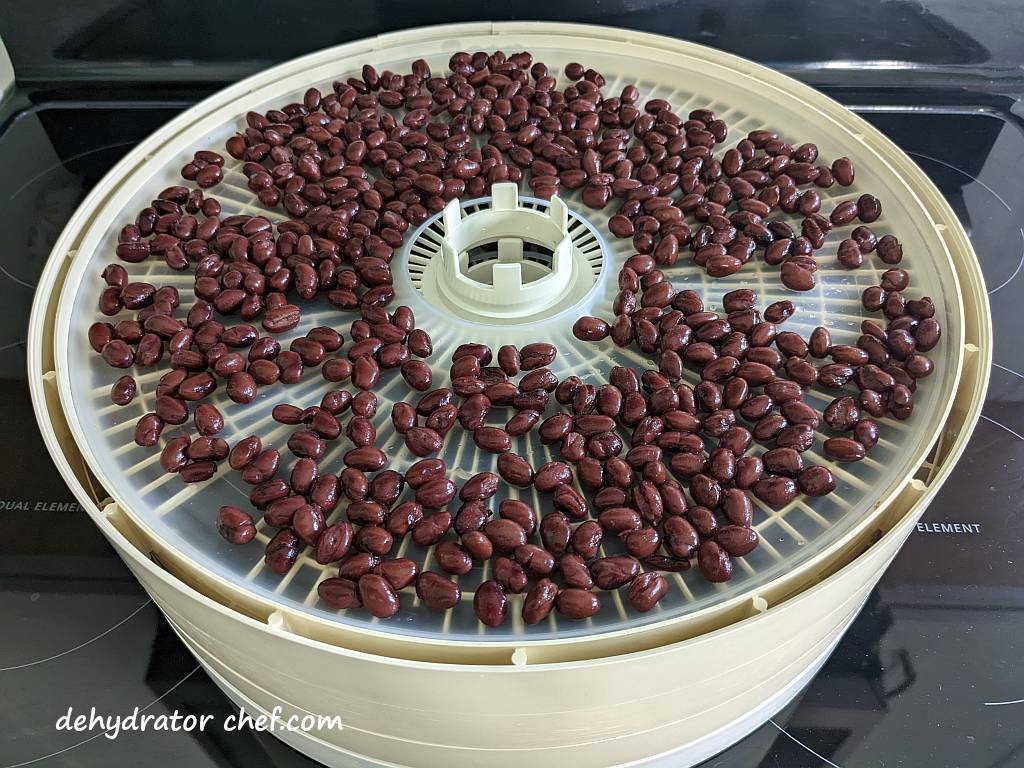
Evenly spread and layer the beans over the fruit roll sheet inserts. Spread them out for better airflow and faster dehydration. If it’s too crowded prepare another tray.
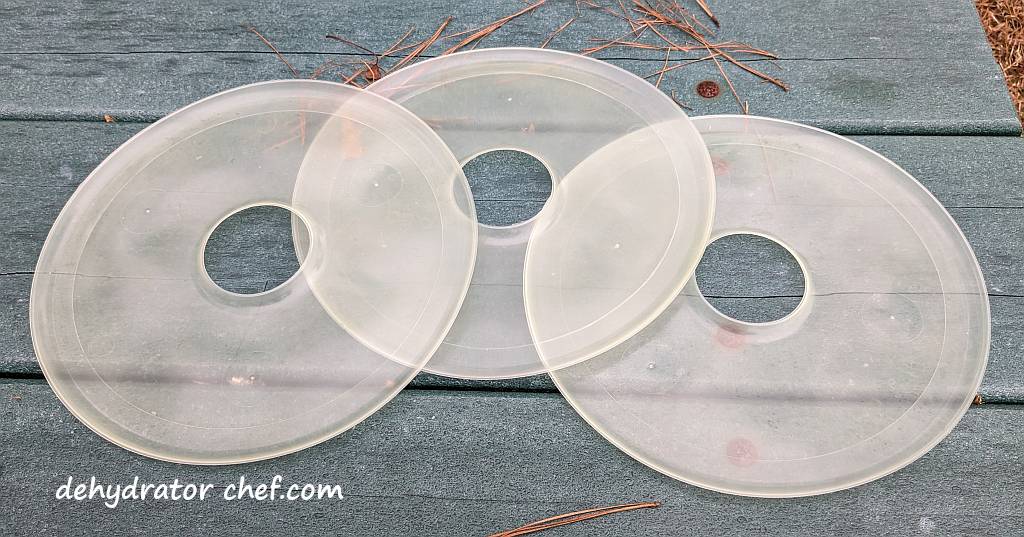
We will use these removable Nesco fruit roll sheet inserts on our food dehydrator for today’s project. They have over 3000 customer reviews with an average rating of 4.5 stars out of 5, which is evidence of a great product. Check out other Nesco food dehydrator products here.
The Nesco 13.5-inch round dehydrator tray has close to 119 square inches or .8 square feet of surface area for drying.
One can of rinsed beans will easily fill one Nesco 13.5-inch round dehydrator tray with a fruit roll sheet.
Step 3. Dehydrating Canned Beans
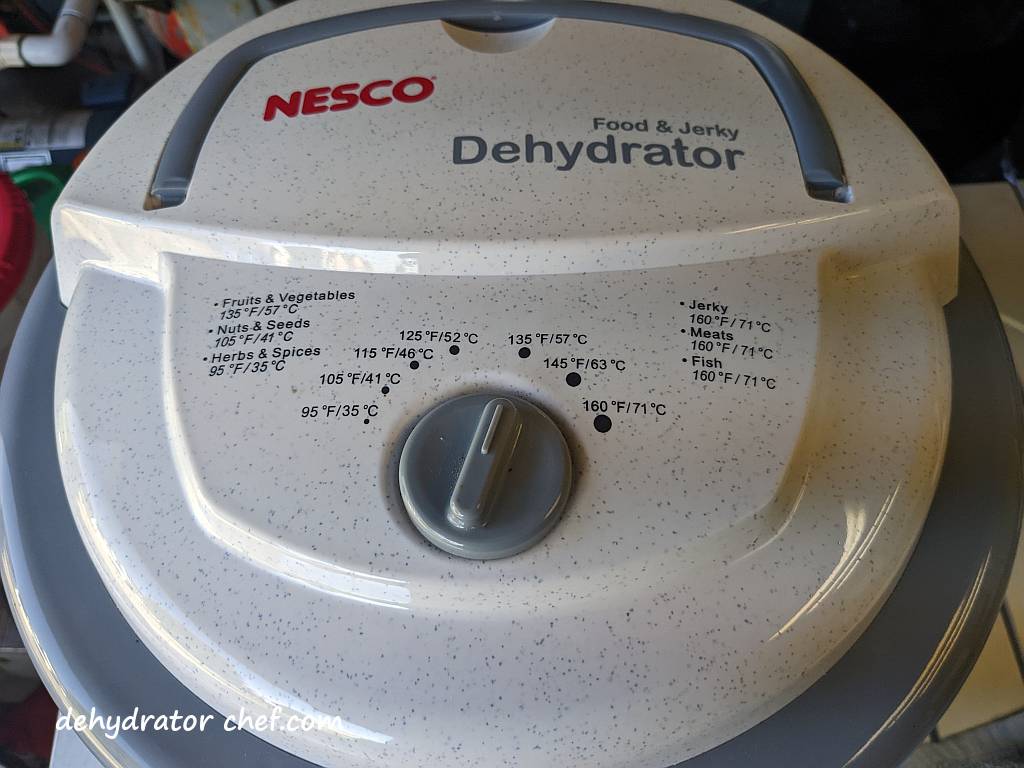
Set the drying temperature to 160 °F / 71 °C for 2 hours, then dial it back to 135 °F / 57 °C to speed up dehydration. Canned beans will dehydrate in approximately 6 to 8 hours, depending upon the ambient temperature and humidity and how crowded the trays are filled. Remember to use drying times as a guide.
Step 4. When are the Dehydrated Canned Beans Done
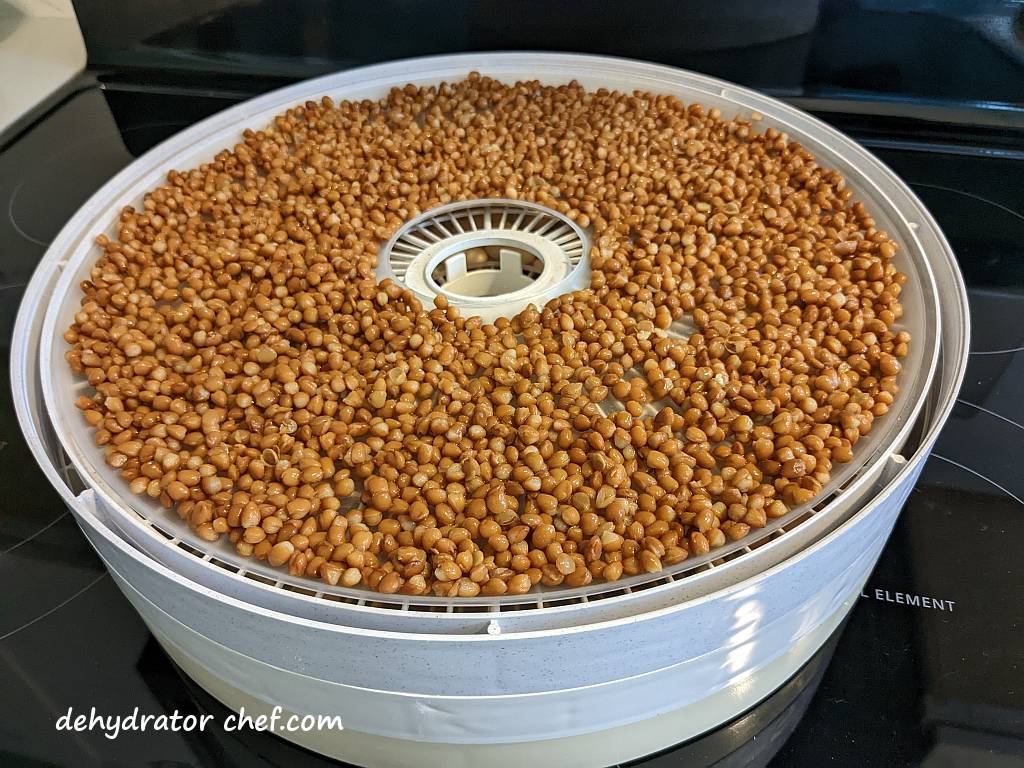
Start checking for doneness in 6 hours. Canned beans take 6 to 8 hours to dehydrate at 135 °F / 57 °C depending on ambient temperatures and humidity and how crowded you fill your trays.
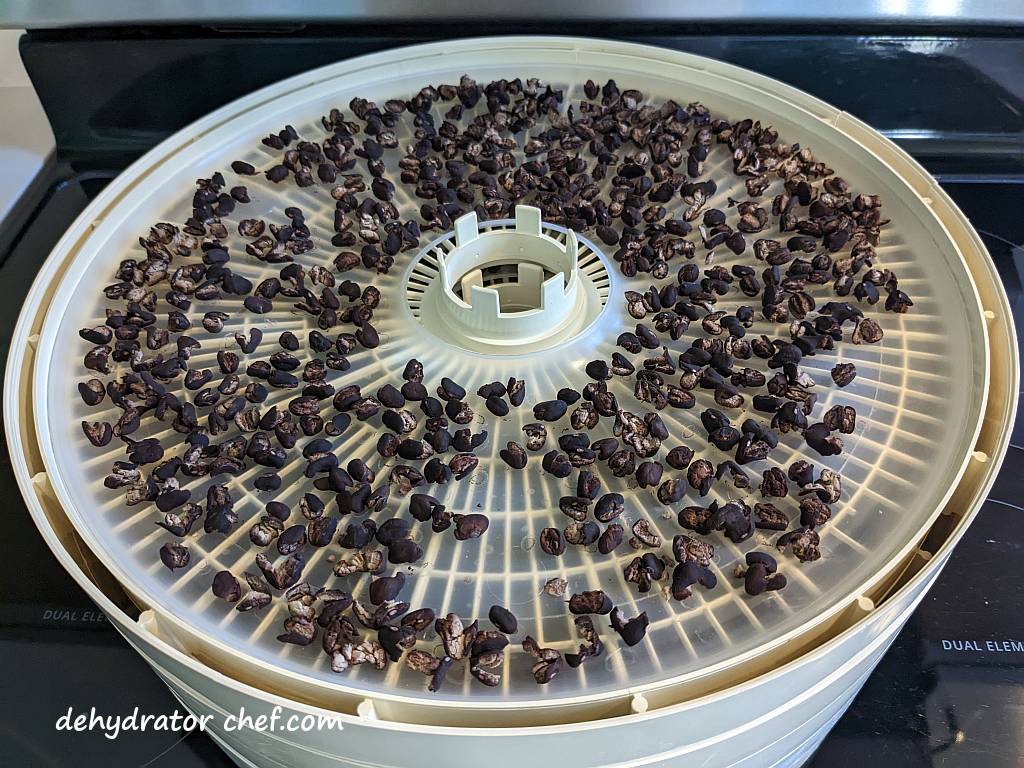
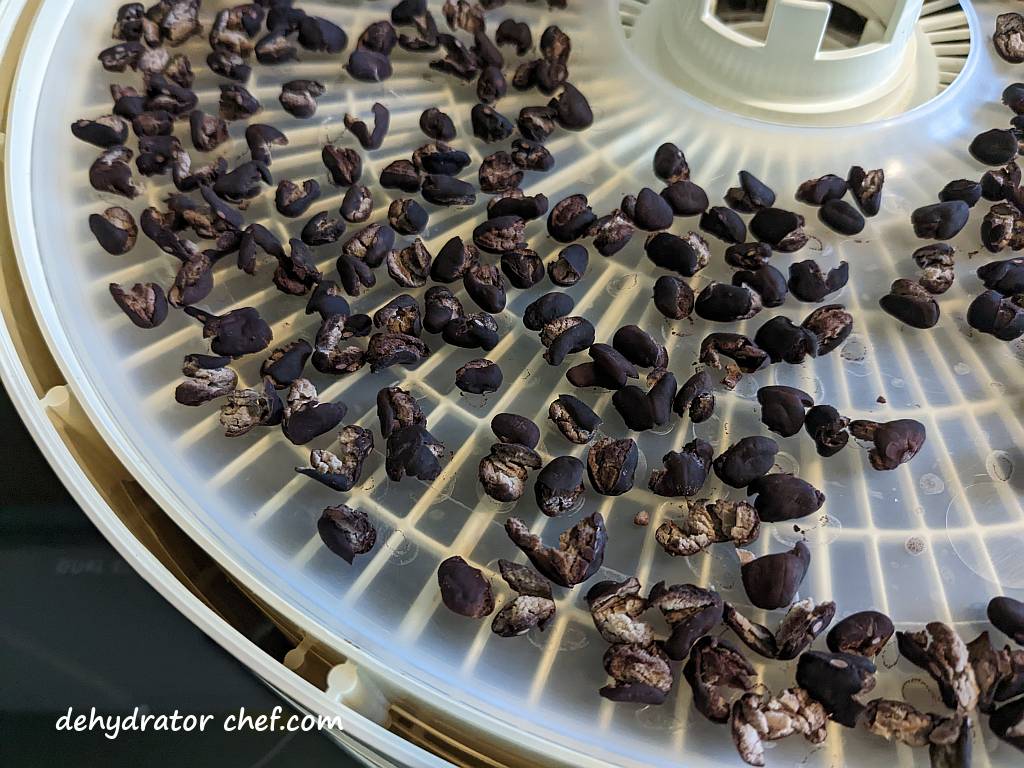
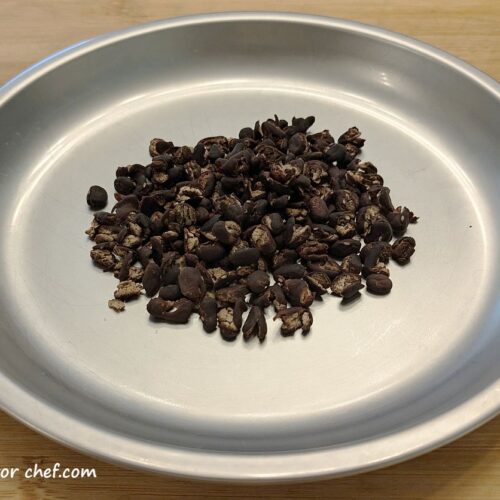
They will be crunchy if tasted and will easily break into a powder if crushed between your fingertips when finished dehydrating.
Drying times will vary depending on your dehydrator. Refer to your dehydrator owner’s manual for recommended temperatures and times for dehydrating specific foods. Remember to use drying times as a guide.
You’ll notice that the skin will break or split from the beans shrinking as they dry. This is expected.
Step 5. Equalizing and Conditioning the Dehydrated Beans
When the dehydrated beans are removed from the dehydrator, any remaining moisture in the dried beans may not be distributed equally because of their size or their location and position in the dehydrator. Equalizing and conditioning is a procedure for freshly dehydrated foods that ensures any residual moisture remaining in any piece is spread or equalized among all the other pieces in the batch. Let the dehydrated beans equalize and condition in the canning jar for 7 to 10 days.
We always recommend letting food items cool completely after they have finished dehydrating and before packing them into an airtight storage container for equalizing and conditioning. Warm food may cause sweating which could provide enough moisture for mold to grow.
It does not take long for dehydrated food items to start hydrating from naturally occurring household humidity. Do not leave dehydrated food items exposed to the elements any longer than necessary because of the increased risk of mold growth.
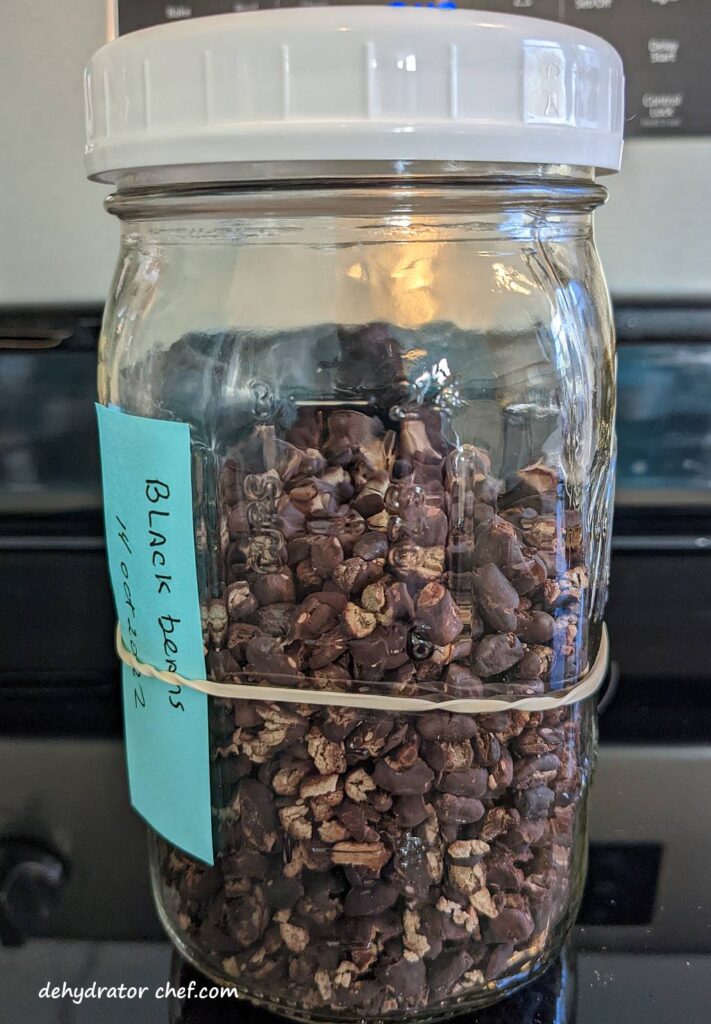
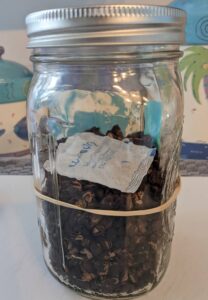
After a short cooling period, pack the dehydrated beans into clean, dry, insect-proof containers with tight-fitting lids. We’ll use pint- and quart-size canning jars for this task. Fill the jars at most 2/3 to 3/4 full, leaving some headspace.
Headspace is the distance between the food surface and the lid’s underside. Its purpose is to provide ample space for the dehydrated food product to slide and tumble when shaken and rotated to expose any evidence of clumping or sticking.
A quality stainless steel or plastic canning jar funnel makes the messy job of getting dehydrated foods off the dehydrator tray removable inserts and into the canning jars an easy task. Take a minute or two and check them out on Amazon.
Every day, check the jar for moisture. Roll the jar contents around and note any clumping or sticking. If seen, put the contents back on the dehydrator for several more hours. Since canning jars are clear, it’s easy to see what’s inside.
Step 6. Storing the Dehydrated Beans
In the equalizing and conditioning phase in Step 5, we left some headspace so we could easily inspect the dehydrated beans. Now that we are in the storage phase, we can pack the dried beans into clean, dry, and insect-proof containers as tightly as possible without crushing. Note that dried beans can be easily crushed into small bits.
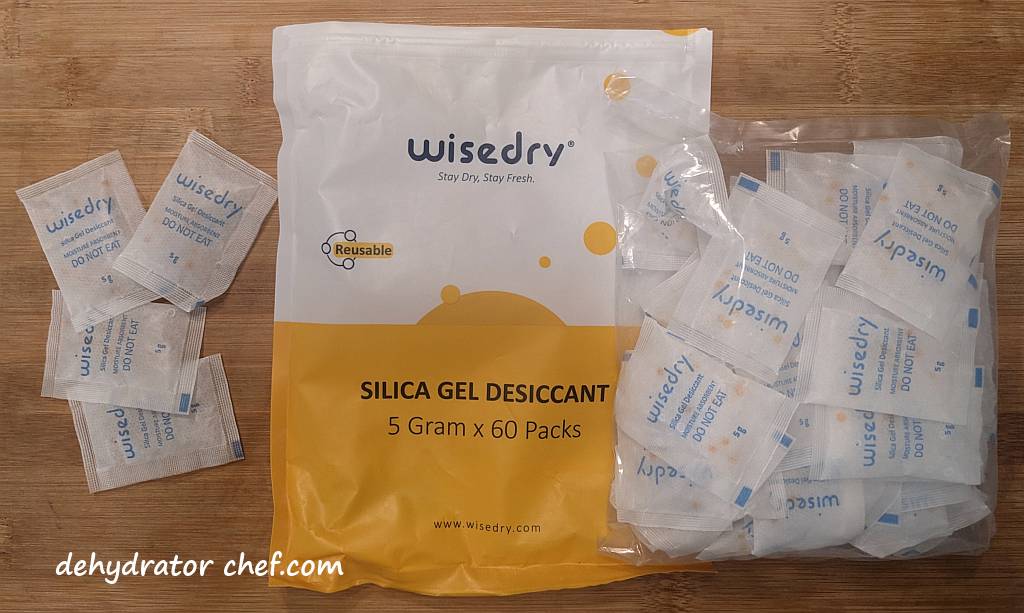
We continue to use clear canning jars with tight-fitting lids as storage containers. They are transparent, making it easy to see the contents. We’re also adding moisture-absorbing desiccant packets. I don’t use a desiccant packet for moisture control during the equalizing and conditioning phase in Step 5. Doing so might mask moisture issues should the food items not be adequately dried.

We use these inexpensive food-safe desiccant packets, which are available from Amazon. These 5-gram packets have over 5000 of mostly 4- and 5-star customer reviews, with an average of 4.7 stars out of 5. Our bag of 60 desiccant packets will last quite a while because they can be recharged and reused multiple times. Other food-safe sizes are available.
Do not leave your dehydrated food items exposed and unprotected any longer than necessary for the task at hand. It does not take long for dehydrated food items to naturally start hydrating from ambient household humidity. As such, this will increase the risk of mold growth.
Lastly, attach or include a short note describing the contents and the date the product was dehydrated. The note also informs us where to go in the dehydrator logbook to make another note.
Hydration
Hydrate dried beans using a 1-to-1 ratio of dehydrated beans to water.
We have used both cold water and hot water to hydrate. Plan on 15 to 20 minutes to fully hydrate.
If you’re supplementing a freeze-dried meal like we now do, just add a bit more boiling water to the pouch in the same 1-to-1 ratio.
Weights, Measures, and Serving Sizes
This information is from a recent entry from the notes we keep on most of our food dehydration projects.
One can of rinsed and drained black beans weighed in at 233 grams or 8.2 ounces. Rounding the serving sizes from “about 3.5” per can, according to the food label, to 3 would make for a serving size of 77.66 grams before any dehydration.
After dehydration, the per-serving weight was 24 grams and 1/4 cup by volume.
Dehydrated Black Beans Nutrition
Serving Size: 24 grams | Calories: 140kcal | Total Fat: <1g| Saturated Fat: 0g | Cholesterol: 0mg | Sodium: 12mg | Carbohydrate: 25g | Dietary Fiber: 7g | Sugar: <3g | Protein: 8g
Insider Tips
Add these dehydrated beans to your favorite freeze-dried food pouches. Be sure to compensate by adding a bit more water as you prepare your meal.
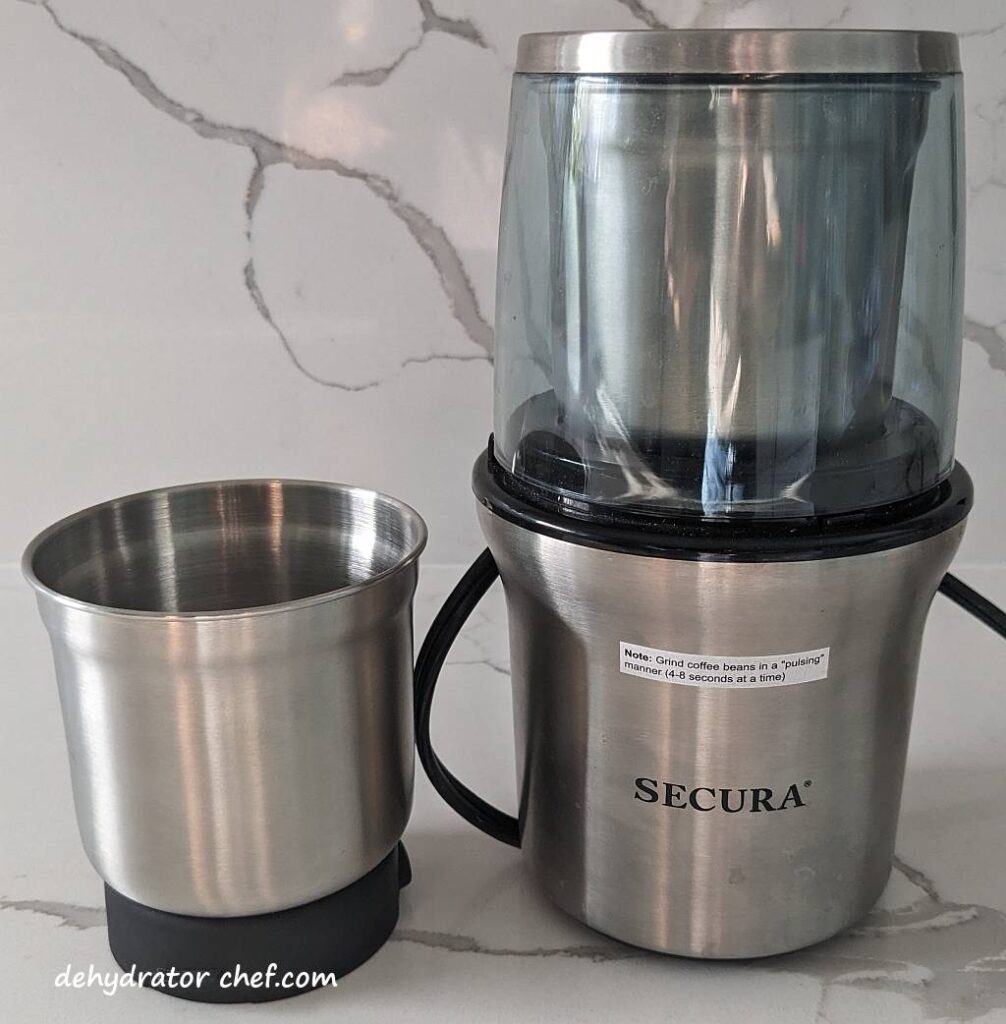
Dehydrated beans can also be powdered in a spice grinder to make thickeners or mixed with other dried ingredients to make hummus or vegetable dips. This is the spice grinder we use, it’s available at Amazon.com. It has close to 4,000 customer reviews, with an average of 4.4 stars out of 5. It comes with 2 grinding bowls, a 2-blade grinder, and a 4-blade chopper. It’s also easy to clean out the spice residue when you’re finished.
How to Use Dehydrated Beans in Camping Meals
Okay, so you’ve got a jar of dehydrated beans sitting on the shelf in your pantry. Now what? Here are a few links to some practical, field-tested recipes that use dehydrated beans in our homemade camping meals.


How to Dehydrate Canned Beans
Equipment
- Removable fruit roll sheet insert (one for each dehydrator tray)
- Common kitchen tools (including cutting boards, chef's knife, spatula, strainer, etc.)
- Canning jars with tight-fitting lids
- Desiccant packets for moisture control (optional)
Ingredients
- several 15-ounce containers canned beans (black beans, pinto beans, kidney beans, etc.)
Instructions
Process the Canned Beans
- Using a colander, drain and rinse the beans to remove the starchy canning liquid.
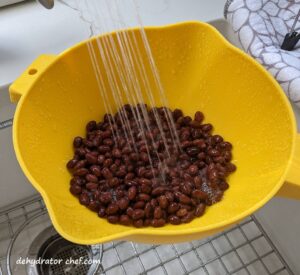
- Inspect the beans as you rinse them, removing anything that shouldn't be there. Despite the use of modern cleaning equipment, it is not always possible to remove all foreign materials.
Prepare the Dehydrator
- Spread and layer the processed beans on the fruit roll sheet inserts; one 15-ounce can of beans will fill one 13.5-inch round dehydrator tray. If it’s too crowded, prepare another tray.
Dehydrate the Beans
- Set the dehydrator thermostat temperature to 160 °F (71 °C) for 2 hours, then dial it back to 135°F (57 °C) to speed up dehydration. Dry for 6 to 8 hours until done.

- The beans may break or split from shrinking as they dry. This is expected.
When is the Dehydrated Beans Done
- When done, the beans will easily crush into a powder. They will be crunchy if taste-tested.
Equalizing and Conditioning the Dehydrated Beans
- After a short cooling period, loosely pack the dried beans into a clean, dry canning jar with a tight-fitting lid, leaving some headspace.

- Every day, for 7 to 10 days, check the jar for moisture. Roll the jar contents around and note any clumping or sticking. If seen, put it all back on the dehydrator for several more hours.
- If you notice any mold at all, even the slightest bit, throw it all out.
Storing the Dehydrated Beans
- Use appropriate-sized canning jars for storage. Depending on how well you dehydrate them and your pantry storage conditions, the dehydrated beans should keep for at least 12 months.
- An optional food-safe desiccant packet will aid with moisture control and enable a longer shelf life

- Attach or include a label describing the jar contents and the date the product was dehydrated. The label identifies the canning jar contents, and the date helps with the rotation schedule. A first-in, first-out rotation helps us to use items that have been on the shelf the longest, so we're using the oldest food first.
Notes
Nutrition
Nutrition information is only an estimate and may differ depending on the ingredients you use.
2 replies on “How to Dehydrate Canned Beans – Dehydrating Canned Beans, A Step-by-Step Guide”
Canned beans are so easy to dehydrate, what a great idea, love the recipe! I like pinto beans myself, I can easily make refried beans with this recipe. The beans break, which is a plus because it easier for me to make creamer refried beans.
Linda, that is a great idea, making refried beans using dehydrated pintos. I’m going to give it a go.