This is our step-by-step guide on how to dehydrate ground beef. Dehydrated ground beef is one of the primary ingredients found in our camping kitchen, prepper pantry, and in making our homemade dehydrated MREs.
Fresh ground beef is something we use nearly every day in one way or another. So it just makes good sense to dehydrate what you use and have it on hand for when it’s needed.
In other words, dehydrate and store the foods you would normally eat.
Home-dehydrated ground beef is also a great addition to most any freeze-dried food pouches you might have on hand now or later. I am thinking about the Mountain House favorites such as Beef Stroganoff or the Chili Mac with Beef. They just don’t seem to have enough meat in them.
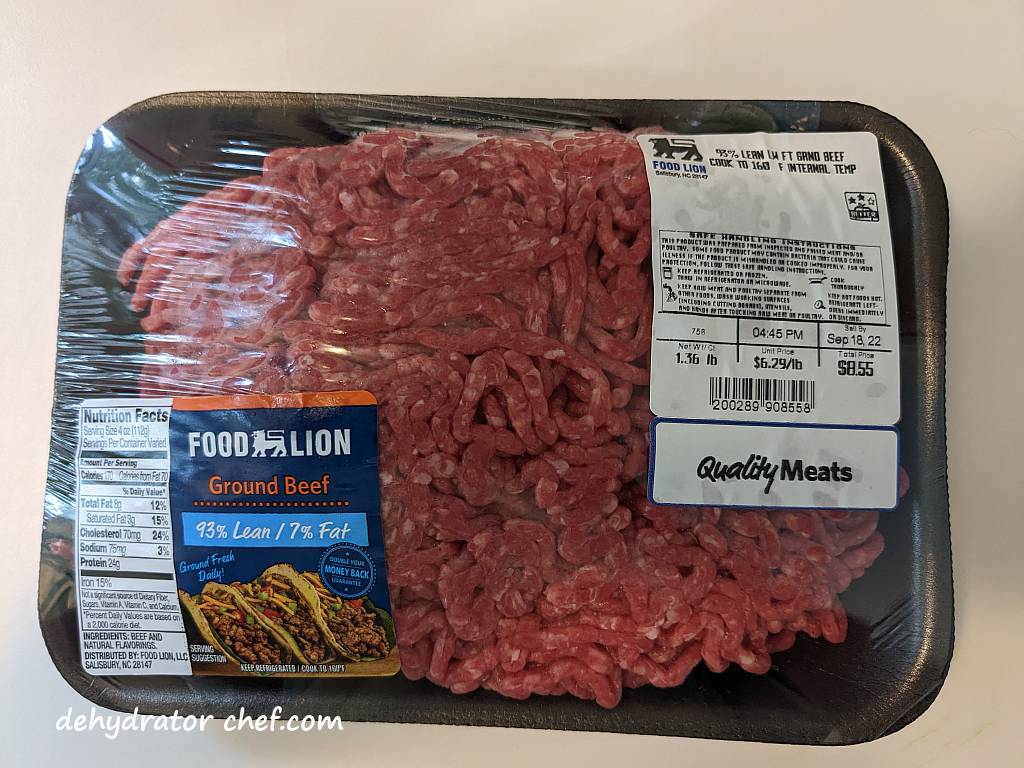
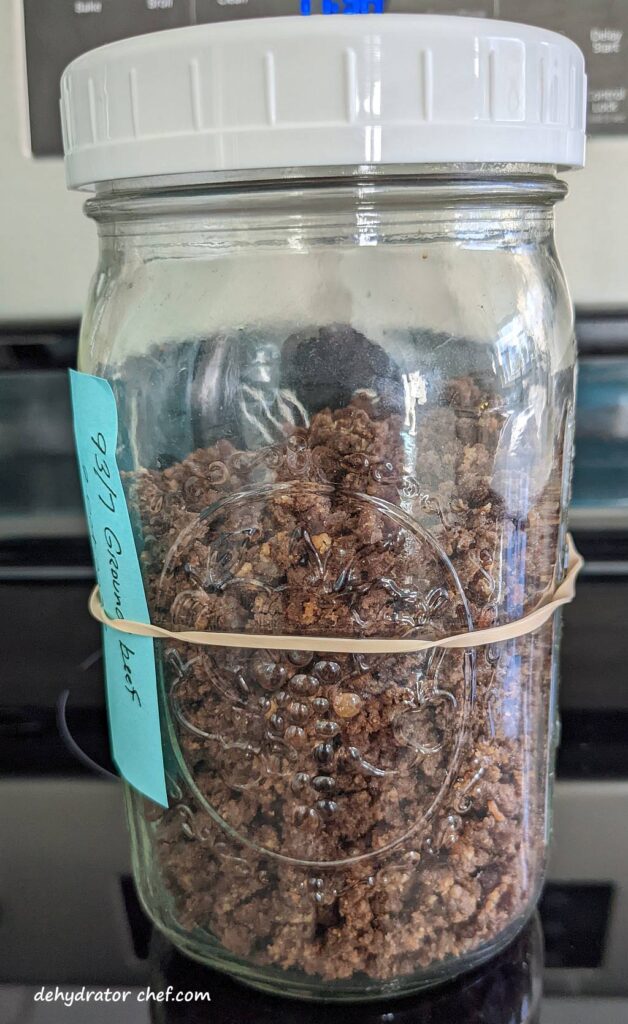
Be sure to look for and use only 93/7 lean ground beef for your dehydrating projects.
Ground beef contains high-quality proteins, essential amino acids, antioxidants, vitamins, and other nutrients. Many of us don’t get enough of these in our daily diet.
So, let’s get started dehydrating some ground beef.
Table of Contents
- How to Dehydrate Ground Beef
- Supplies Needed to Dehydrate Ground Beef
- Step 1. The Process to Dehydrate Ground Beef
- Step 2. Preparing the Dehydrator to Dehydrate Ground Beef
- Step 3. Dehydrating Ground Beef
- Step 4. When is the Dehydrated Ground Beef Done
- Step 5. Equalizing and Conditioning Dehydrated Ground Beef
- Step 6. Storing Dehydrated Ground Beef
- Reconstituting Dehydrated Ground Beef
- Weights, Measures, and Serving Sizes
- Dehydrated Ground Beef Nutrition Information
- Dehydrator Chef Insider Tips
- How to Use Dehydrated Ground Beef in Camping Meals
How to Dehydrate Ground Beef
The best ground beef for dehydrating and longer storage potential is 93/7 lean-to-fat ratio. Fat does not dehydrate and will eventually go rancid, meaning it’s time to get rid of it. Lots of websites talk about fats and rancidity but never explain it. We’ll save that for later.
All you need to dehydrate ground beef is a good-quality food dehydrator. We use the Nesco food dehydrators. You can check out our food dehydrator guide to learn why we think Nesco offers the best bang for the buck. We believe this is the best food dehydrator for our long-term food storage needs.
Supplies Needed to Dehydrate Ground Beef
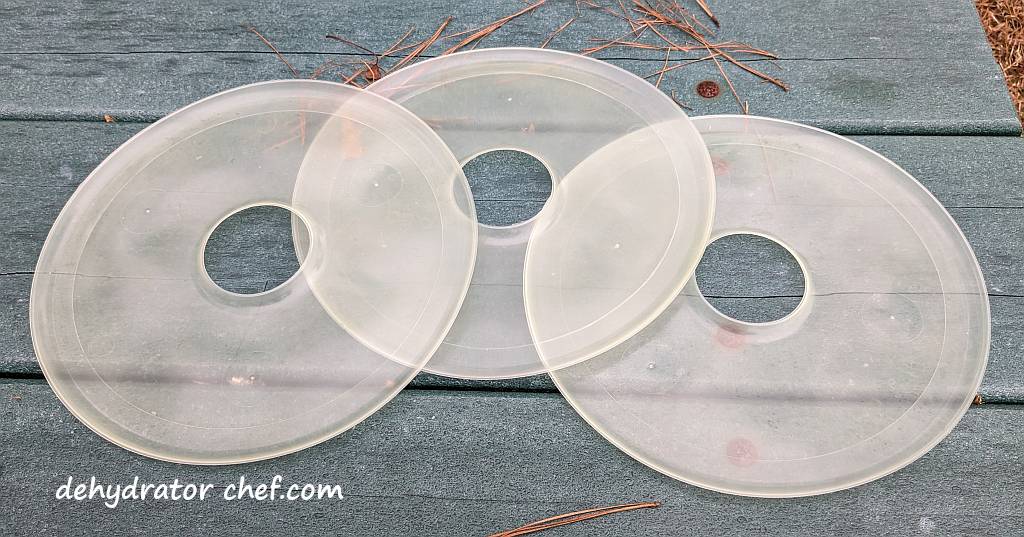
- Food dehydrator
- Removable fruit roll sheet inserts for the dehydrator trays
- Standard kitchen tools, including cutting boards, chef’s knife, spatula, non-stick frying pan, etc.
- Clear canning jars with tight-fitting lids
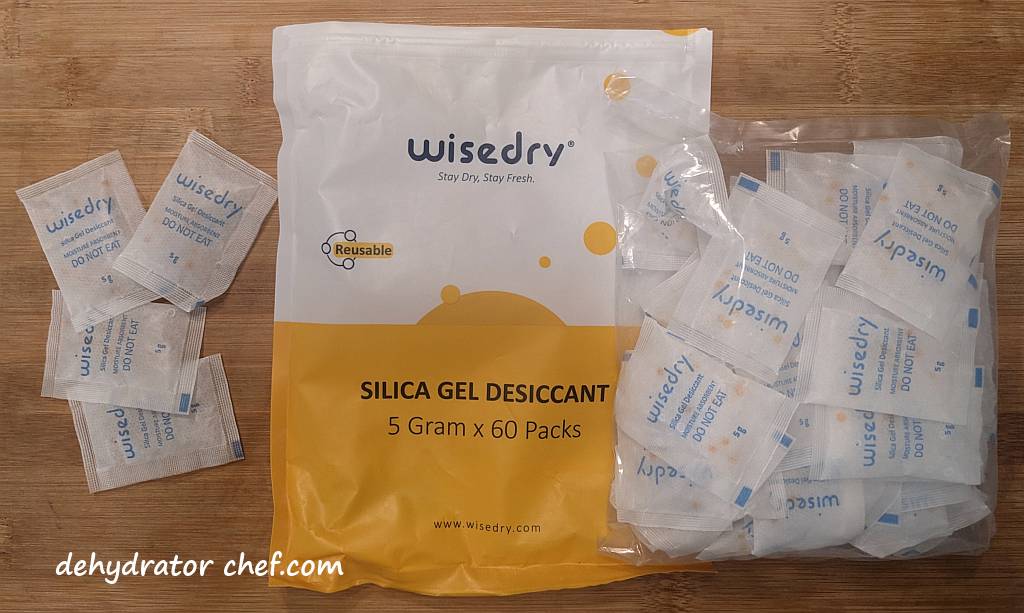
- Desiccant packets (optional, for extended shelf life and moisture control)
- Wide-mouth canning jar funnel
- 1 pound lean 93/7 ground beef
- 1/2 cup plain breadcrumbs for every 1 pound of lean ground beef
 | Make Your Own Dehydrated Camping Meals Available only on Amazon.com Step-by-step instructions for 26 homemade trail meals, from hearty dinners to quick breakfasts. Includes exclusive recipes not published on the blog. Grab yourself a copy today. |
Step 1. The Process to Dehydrate Ground Beef
Dehydrated ground meat will turn into gravel-like pieces. But we can fix this. Our recipes that use ground meat can be spruced up with just a few ingredient tricks. We will add a panade to our ground meats before dehydration.
When meat is ground into smaller pieces, then cooked and dehydrated, almost all the moisture disappears and affects the texture of the meat. Rehydrating ground meat so it’s edible seems to take forever. Adding a panade will help alleviate this problem keeping the meat tender and flavorful.
A panade is a mix of starch and liquid you would add to the ground meat so it doesn’t get hard or dry when cooked. The starch will also help bring in moisture and hydrate the meat for a better texture in our dehydrated meals.
Any combination of starches, such as bread, bread crumbs, or crackers, will work. Similarly, liquids such as milk, buttermilk, stock, or water can be used. We could also add additional spices if we wanted.
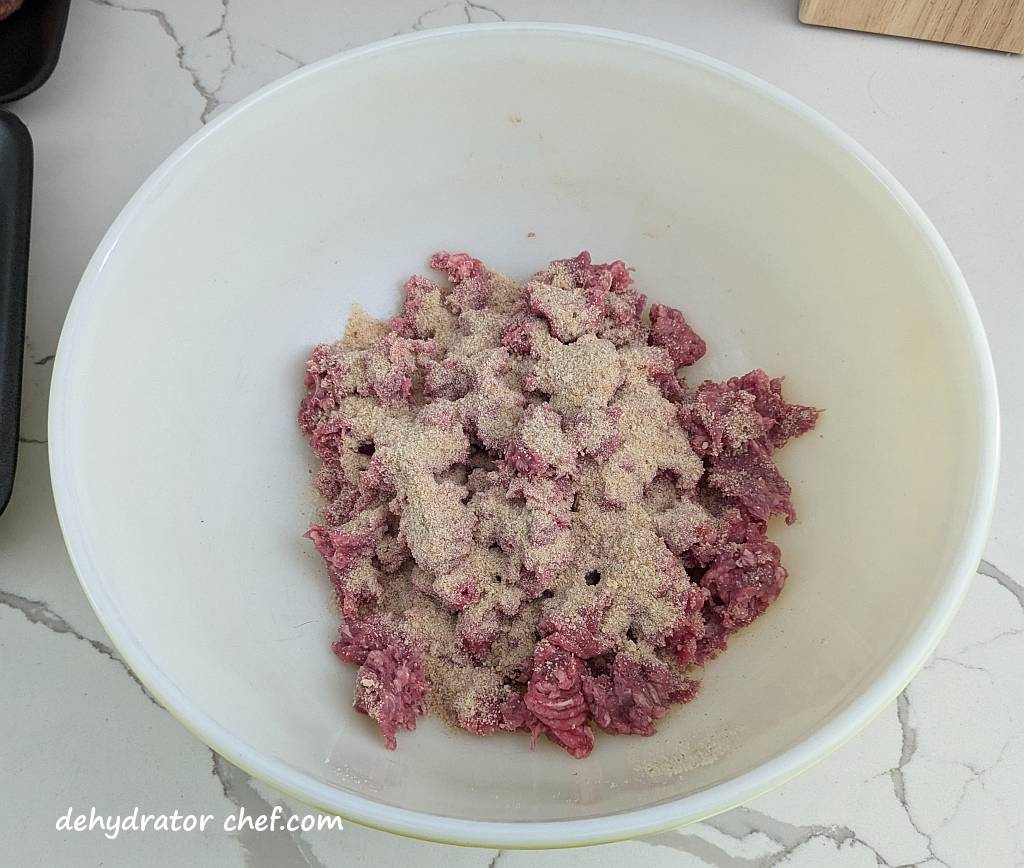
But we’re skipping the liquid and just adding breadcrumbs. The liquid comes later. We are adding 1/2 cup of breadcrumbs to every pound of ground beef.
You can easily make breadcrumbs in your food dehydrator. Dehydrate a few slices of bread or muffins for several hours at 135 °F (57 °C), then coarsely chop them in a blender or food processor.
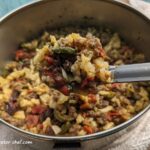
In a mixing bowl, working in batches, layer in the breadcrumb, followed by small marble-sized pieces of ground beef. Then repeat until all of the ground beef and breadcrumbs are layered into the mixing bowl.
Then, thoroughly mix the ground beef and breadcrumb and form it into a large meatball.
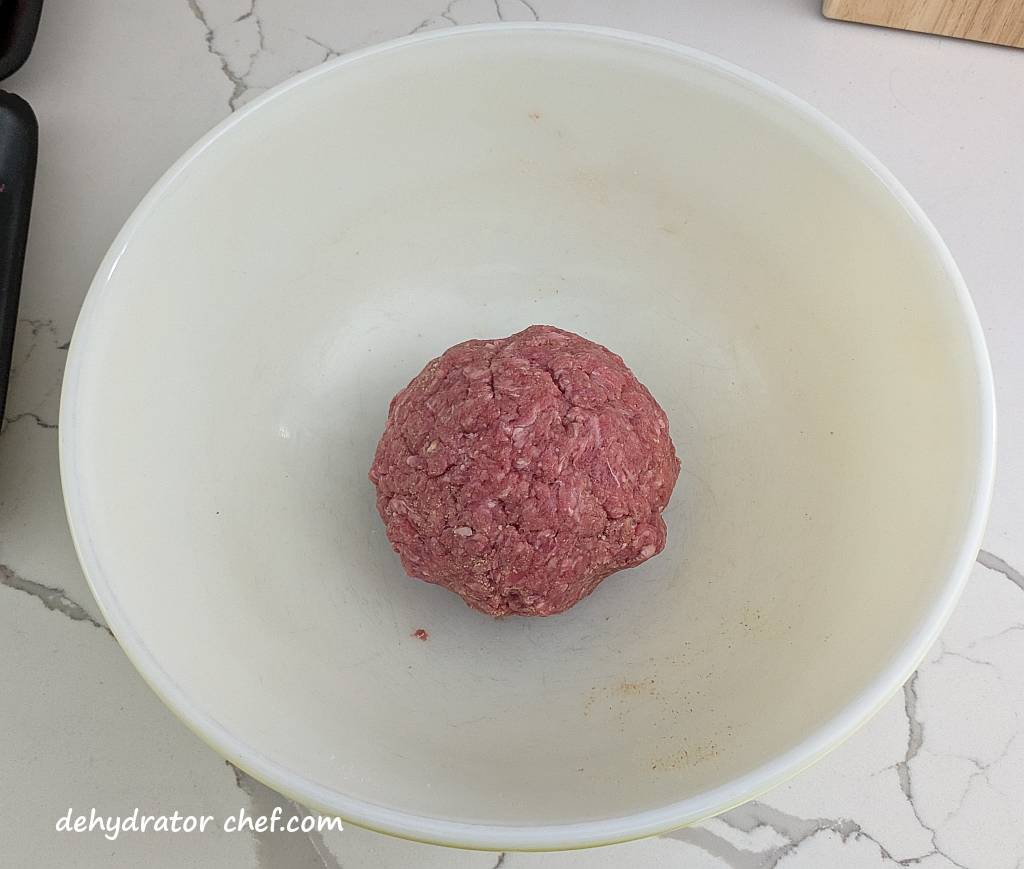
Cover the mixing bowl with plastic wrap and let the meat mixture rest in the refrigerator for at least 30 minutes to overnight for best results.
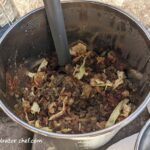
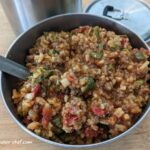
Later, in a skillet over medium heat, cook the ground beef until done and no longer pink. You may want to do this in smaller batches. As it cooks, break the meat apart as it cooks into smaller pieces.
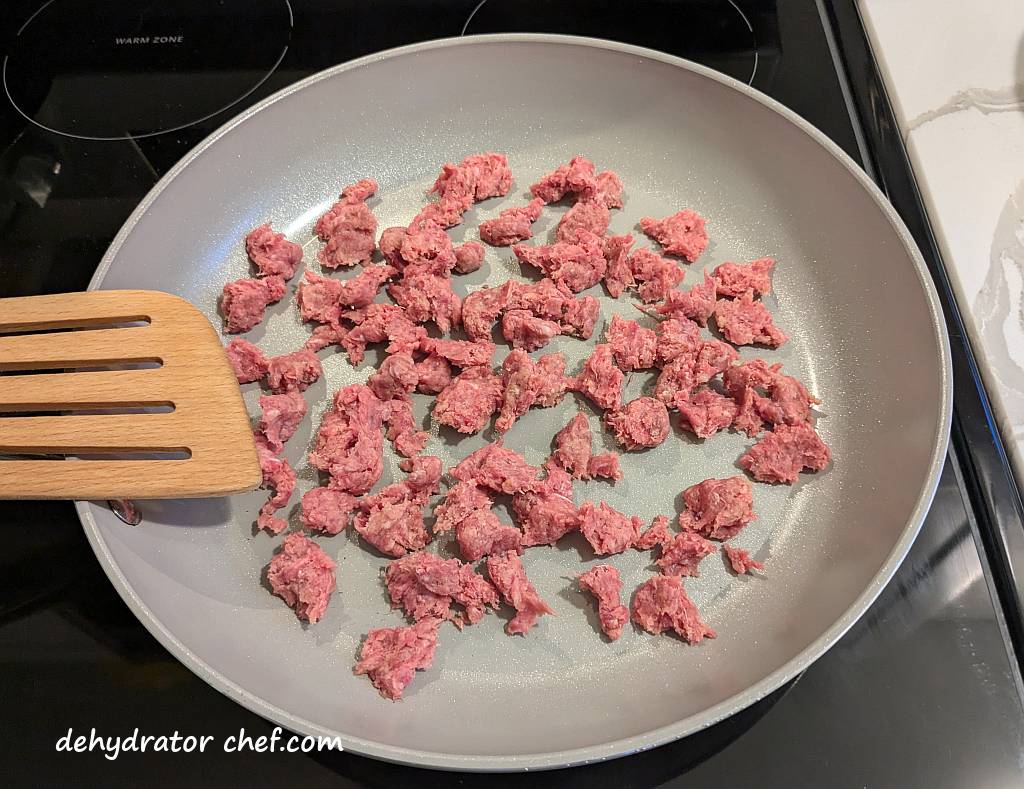
When cooked, take the additional time to chop the cooked ground beef into smaller crumbles on a cutting board. You may notice the cooked ground beef feels a bit gummy or tacky. However, the smaller beef crumbles will hydrate much quicker and yield better results.
Step 2. Preparing the Dehydrator to Dehydrate Ground Beef
We will use these removable Nesco fruit roll sheet inserts on our food dehydrator for today’s project. They have over 3000 customer reviews with an average rating of 4.5 stars out of 5, which is evidence of a great product. Check out other Nesco food dehydrator products here.
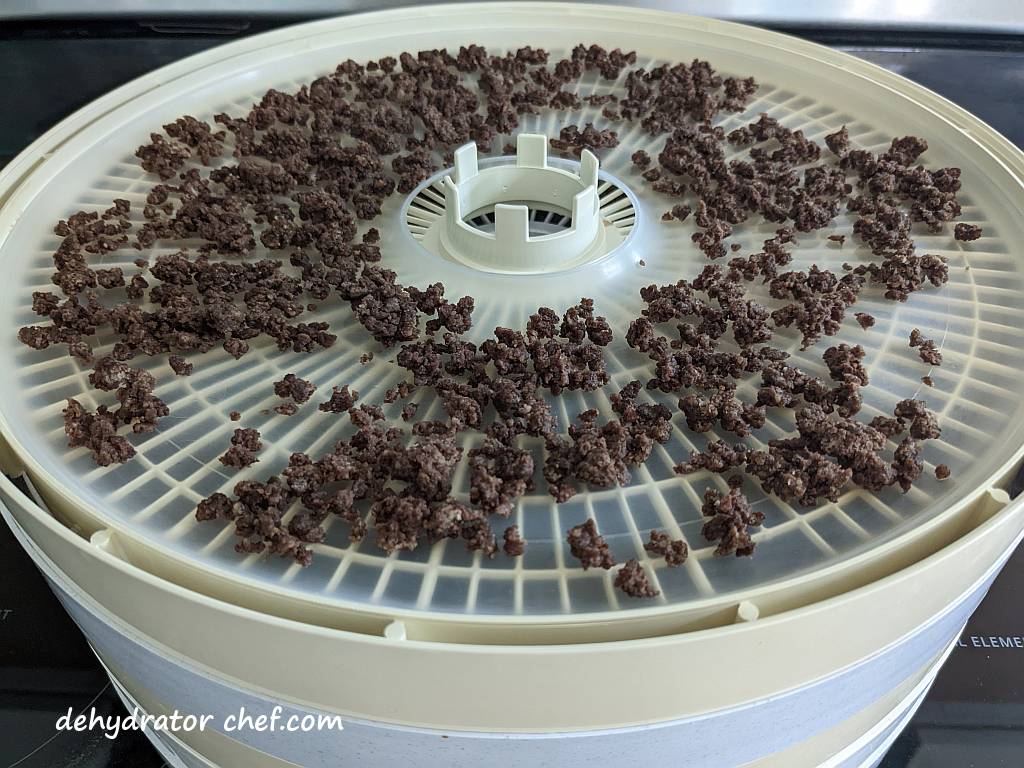
Try to spread a thin layer of beef crumbles on the dehydrator trays for a better outcome and a faster dry time. We average 2 dehydrator trays for every pound of cooked ground beef in our Nesco food dehydrator.

The Nesco 13.5-inch round dehydrator tray has close to 119 square inches or .8 square feet of surface area for drying.
Step 3. Dehydrating Ground Beef
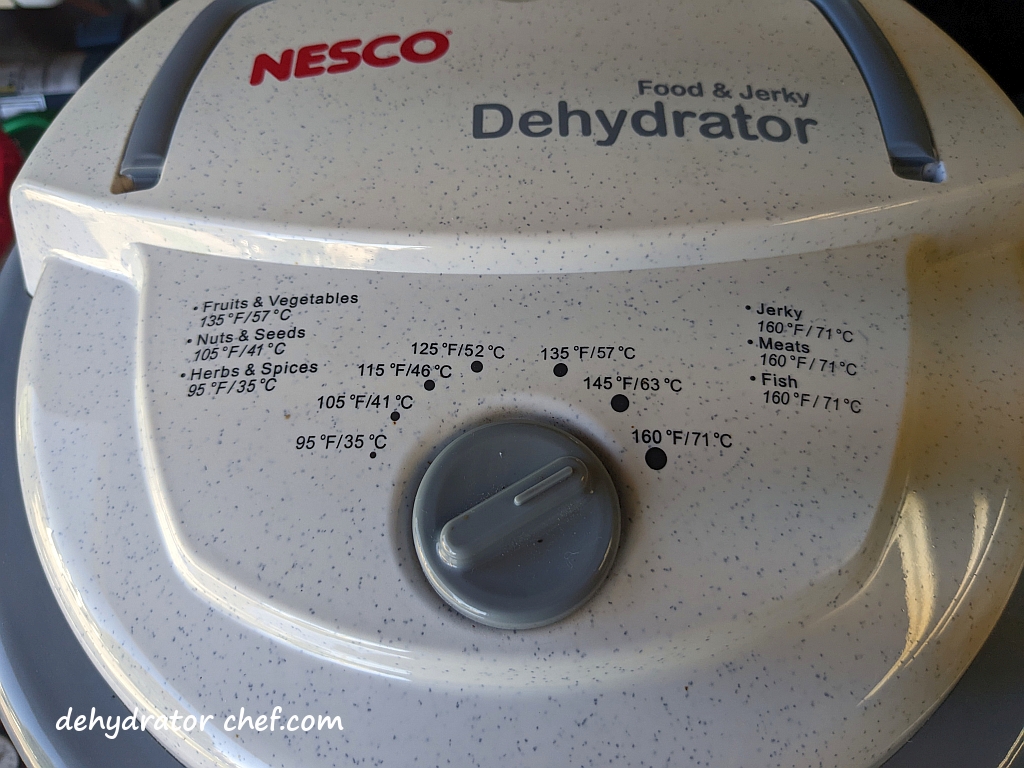
Dehydrate ground beef, just like other meat, at 160 °F (71 °C) until dry. My Nesco food dehydrator takes approximately 6 to 8 hours to dehydrate the ground beef depending upon the ambient temperature, humidity, and how crowded you fill your trays. Remember, use drying times as a guide.
You might notice the ground beef is a bit tacky from the panade as it begins to dehydrate.
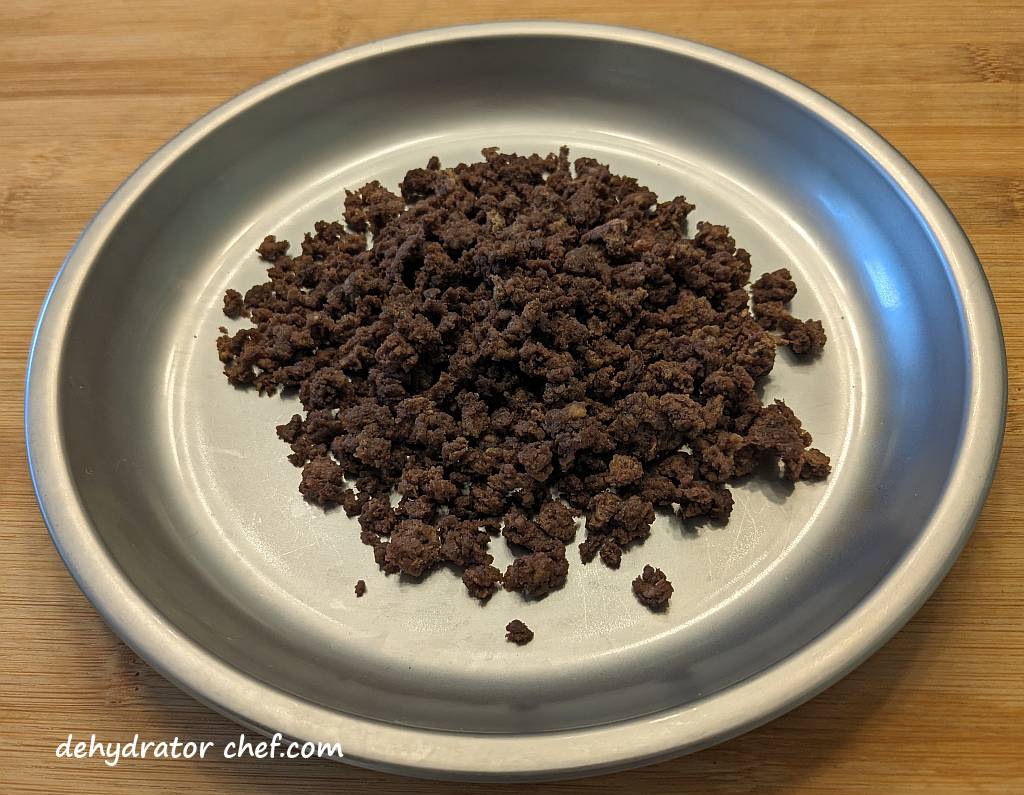
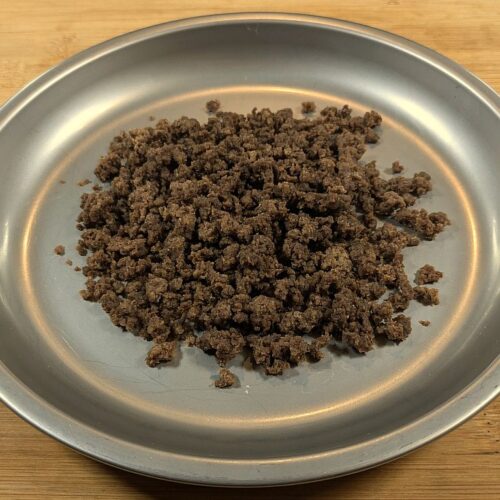
Step 4. When is the Dehydrated Ground Beef Done
When fully dehydrated, the ground beef crumbles will be hard and dry. There should be no tacky pieces.
Drying times will vary depending on your dehydrator. Refer to your dehydrator owner’s manual for recommended temperatures and times for dehydrating specific foods.
Step 5. Equalizing and Conditioning Dehydrated Ground Beef
We always recommend letting food items cool completely after they have finished dehydrating and before packing them in an airtight storage container. Warm food may cause sweating, providing enough moisture for mold to grow.
It does not take long for dehydrated food items to start hydrating from naturally occurring household humidity. Do not leave dehydrated food items exposed to the elements any longer than necessary because of the increased risk of mold growth.
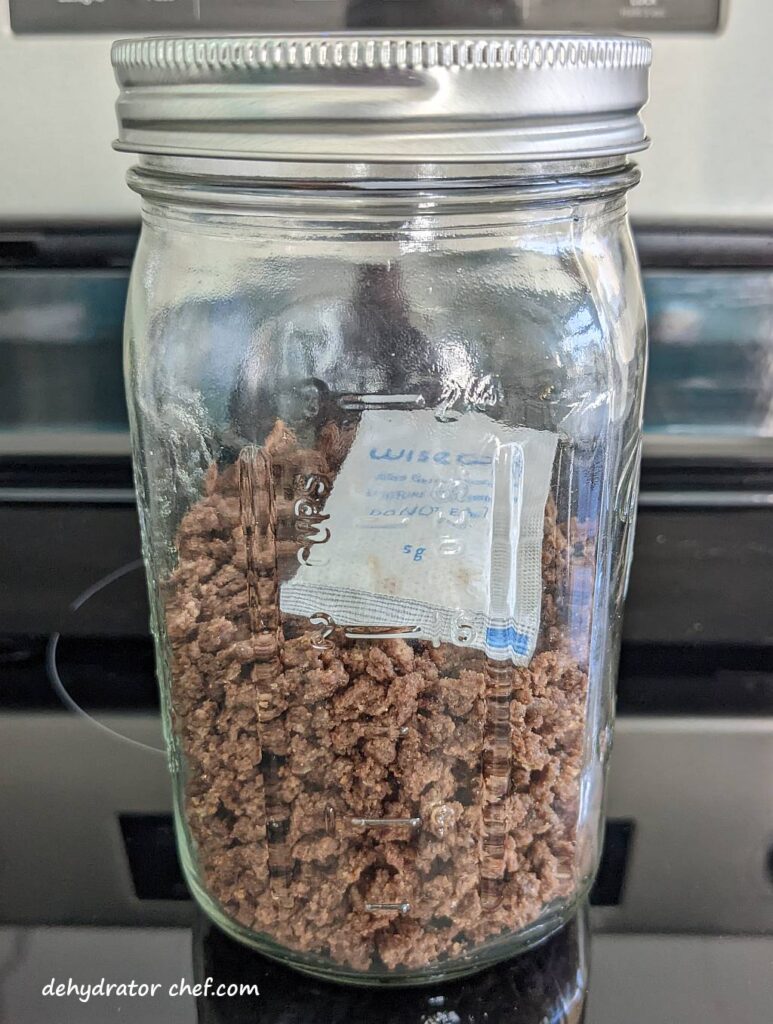
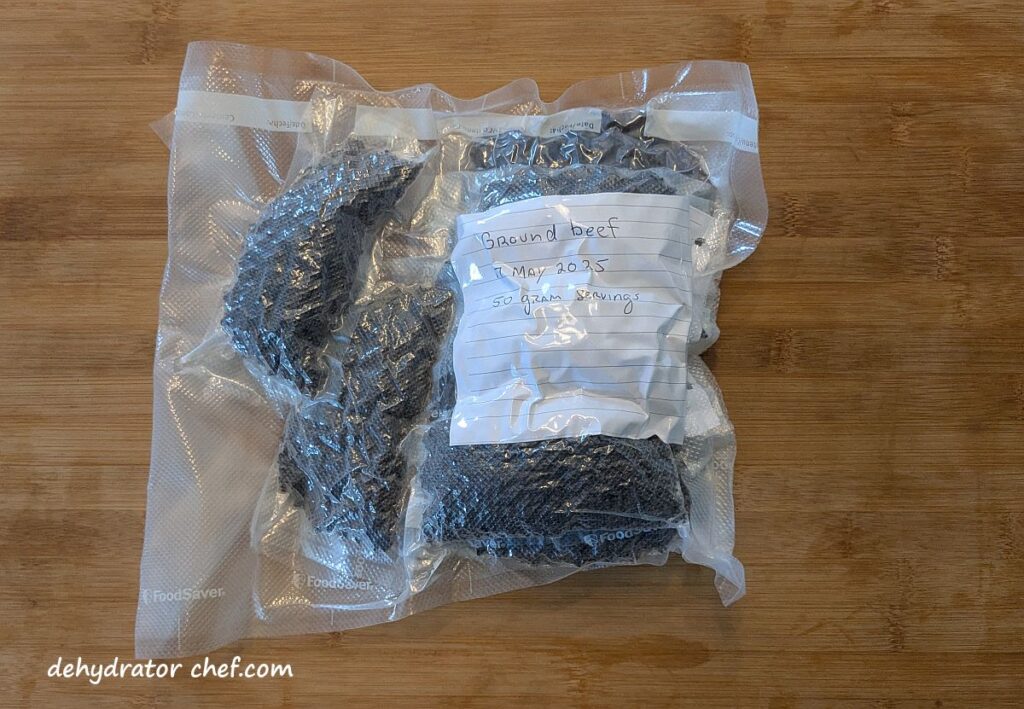
After a short cooling period, pack the dehydrated ground beef into clean, dry, insect-proof containers. We’ll use pint-size or quart-size canning jars with tight-fitting lids.
When the dehydrated ground beef is removed from the dehydrator, any remaining moisture may not be distributed equally because of the size, location, and position. Equalizing and conditioning is a process for freshly dehydrated foods that ensures any residual moisture remaining in any piece is spread or equalized among all the other pieces in the batch. Let the dehydrated ground beef equalize and condition in the storage container for 7 to 10 days.
A quality stainless steel or plastic canning jar funnel makes the messy job of getting dehydrated foods off the dehydrator tray removable inserts and into the canning jars an easy task. Take a minute or two and check them out on Amazon.
Every day, check the jar for moisture. Roll the jar contents around and note any clumping or sticking. If seen, put the contents back on the dehydrator for several more hours. Since canning jars are clear, it’s easy to see what’s inside.
Step 6. Storing Dehydrated Ground Beef
The storage of home-dehydrated meats is a very controversial subject. Should you use oxygen absorbers or not? What about desiccant packets for moisture control? Vacuum sealing? Freezing? Many websites say no, some say yes, while others are silent on this complex and controversial topic.
I don’t use my dehydrated foods for long-term storage. I rotate through it. Otherwise, I’ll use freeze-dried foods for my long-term food storage needs.
The USDA tells us that drying jerky makes it shelf stable for a short period, 1 to 2 months. We’re not dehydrating jerky. My Nesco food dehydrator manual says the shelf life of dried, cooked meats is 2 to 3 weeks at room temperature. They can be stored for up to 6 months in the freezer.
We don’t own any expensive food testing equipment. So we don’t know how long our cooked and dehydrated ground meats remain safe beyond those guidelines, even with the use of desiccant packets, vacuum sealing for freezing, or less-than-ideal pantry storage variables.
We didn’t lay out any hard and fast rules concerning how long dehydrated ground beef will keep before the fats turn rancid. No timetable will tell you. Use your nose; if it smells off, then don’t use it. Experience is a good teacher.
Oxygen absorber manufacturers and some dehydrating and prepper websites say that you should not use oxygen absorbers for home dehydrated meats. Because you cannot be sure of the residual moisture content of dehydrated meats, botulism bacteria may grow in meats that exceed a 10 percent moisture content in a low-oxygen environment and start producing toxins.
Regardless of the type of storage container, it must be air-tight. If it’s not airtight, it will eventually allow your foods to soften and degrade more quickly and possibly even develop mold.
We use these inexpensive food-safe desiccant packets, which are available from Amazon. These 5-gram packets have over 5000 of mostly 4- and 5-star customer reviews, with an average of 4.7 stars out of 5. Our bag of 60 desiccant packets will last quite a while because they can be recharged and reused multiple times. Other food-safe sizes are available.
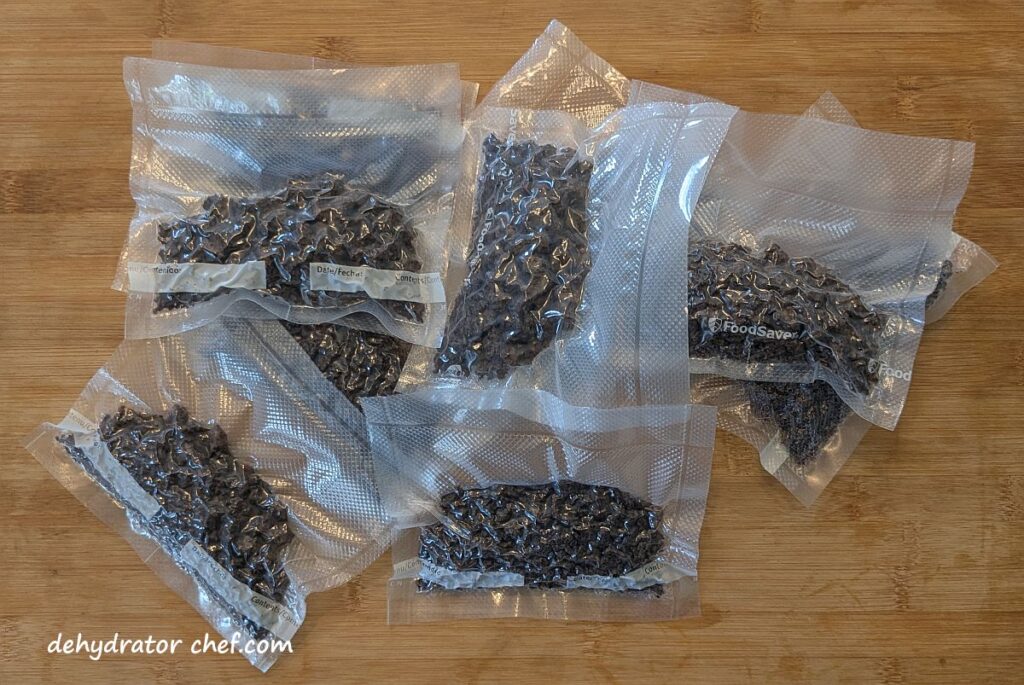
My preferred means of longer-term storage, up to 6 months, for dehydrated ground meats are in vacuum-sealed bags and stashed away in the freezer.
Lastly, attach or include a short note describing the jar contents and the date the product was dehydrated. The label identifies the canning jar contents, and the date helps with the rotation schedule. A first-in, first-out rotation helps us to use items that have been on the shelf the longest, so we’re using the oldest food first. This method helps us maintain the integrity of dehydrated products. The note also lets me know where to go in my dehydrator logbook if I want to make an update.
Reconstituting Dehydrated Ground Beef
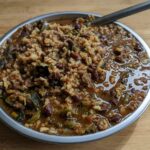
This dehydrated ground beef hydrates best in a 1-to-1 ratio of beef crumbles to water. For example, 1/2 cup of dehydrated beef and 1/2 cup of water.
We have used both cold water and hot water to hydrate. However, water brought to a boil and mixed with the dehydrated ground beef seems to work the best.
For our homemade dehydrated camping meals made with dehydrated ground beef, we’ll let the entire meal hydrate with hot water for at least 20 minutes in an insulated cooking pot.
If you’re supplementing a store-bought freeze-dried meal as we do, just add a bit more boiling water to the pouch. Use the same 1-to-1 ratio of dehydrated meat to water.
Weights, Measures, and Serving Sizes
This information is summarized from the notes we keep in our logbook for most of our food dehydration efforts.
One pound of 93/7 ground beef, about 4 servings, mixed with 1/2 cup of plain bread crumbs will dehydrate to approximately 180 grams.
We consider a ground meat serving-size weight to be 4 ounces. So that is roughly 45 grams of dehydrated weight.
That same 45 grams of dehydrated ground beef is about 1/3 cup.
Dehydrated Ground Beef Nutrition Information
The nutrition information is only an estimate and may differ depending on the ingredients you use.
Serving Size: 45 grams | Calories: 220kcal | Total Fat: 8.75g | Saturated Fat: 3.5g | Cholesterol: 70mg | Sodium: 175mg | Carbohydrate: 10g | Dietary Fiber: <1g | Sugar: 1g | Protein: 26g
Dehydrator Chef Insider Tips
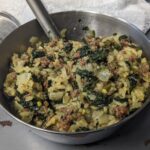
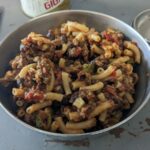
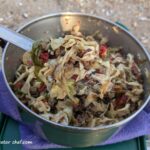
Besides our Dehydrator Chef recipes, add these dehydrated beef crumbles to your favorite freeze-dried food pouches. Be sure to compensate by adding a bit more water as you prepare your meal.
If you have one, use a non-stick skillet while making this. Lean ground beef and the breadcrumb panade mix might stick to ordinary cookware such as your cast-iron skillet. Be sure to use a mesh-type sink strainer during clean-up, such as one of these, to keep that mess from going down the drain and potentially clogging the kitchen sink.
How to Use Dehydrated Ground Beef in Camping Meals
Okay, so you’ve got a jar of dehydrated ground beef crumbles sitting on the shelf in your pantry. Now what? Here are a few links to some practical, field-tested recipes that use dehydrated ground beef in our homemade camping meals.


How to Dehydrate Ground Beef
Equipment
- Removable fruit roll sheet insert (one for each dehydrator tray)
- Common kitchen tools (including cutting boards, chef's knife, spatula, mixing bowls, non-stick frying pan, etc.)
- Canning jars with tight-fitting lids
- Desiccant packets for moisture control (optional)
Ingredients
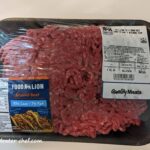 1 pound ground beef (choose 93/7 lean ground beef)
- ½ cup plain bread crumbs
Process the Ground Beef
Instructions
Process the Ground Beef
- Working in batches, sprinkle a layer of breadcrumbs into a mixing bowl. Then pinch off several small marble-sized pieces of ground beef and layer on the breadcrumbs. Then repeat until all of the ground beef and breadcrumbs are layered in the bowl.
- Mix the meat and breadcrumb mixture into a large meatball.
- Cover the mixing bowl with plastic wrap and let rest in the refrigerator for at least 30 minutes to overnight.
- Later, in a skillet over medium heat, pull off marble-sized pieces and cook the ground beef until done and no longer pink. You may want to do this in smaller batches. As it cooks, break the meat apart as it cooks into smaller pieces
Prepare the Dehydrator
- Spread a thin layer of cooked beef crumbles on the dehydrator tray. If you have too many ground beef crumbles, use another dehydrator tray.
Dehydrate the Ground Beef
- Set the dehydrator thermostat temperature to 160 ℉ (71 ℃). Dry for 8 to 12 hours until done.
When is the Dehydrated Ground Beef Done
- When fully dehydrated, the ground beef crumbles will be hard and dry. There should be no tacky pieces.
Equalizing and Conditioning the Dehydrated Ground Beef Crumbles
- After a short cooling period, loosely pack the dehydrated ground beef crumbles into a clean, dry canning jar with a tight-fitting lid, leaving some headspace.
- Every day, for 7 to 10 days, check the jar for moisture. Roll the jar contents around and note any clumping or sticking. If seen, put the ground beef crumbles back on the dehydrator for several more hours.
- If you notice any mold at all, even the slightest bit, throw it all out.
Storing Dehydrated Ground Beef Crumbles
- Use appropriate-sized canning jars for storage. The dehydrated ground beef crumbles might keep for several months depending on how well you dehydrated it and your pantry storage conditions.
- An optional food-safe desiccant packet will aid with moisture control and provide for a longer shelf life.
- Attach or include a label describing the jar contents and the date the product was dehydrated. The label identifies the canning jar contents, and the date helps with the rotation schedule. A first-in, first-out rotation helps us to use items that have been on the shelf the longest, so we're using the oldest food first.
Notes
Nutrition
Nutrition information is only an estimate and may differ depending on the ingredients you use.
3 replies on “How to Dehydrate Ground Beef – Dehydrating Ground Beef, A Step-by-Step Guide”
good
This is my new recipe! In the past, I would just dry the hamburger after cooking it. It never did rehydrate all that well. Adding the breadcrumbs is a real game-changer for me. Great tip. I am checking out the rest of your recipes.
I like your method. Other posts say I should rinse the cooked hamburger with hot water. You do not say anything about doing that. Why not?